Converting Tailored Pages to the New Editor
Convert pages, posts and PPI built using Tailor to the new block editor.
This tutorial is for pages and posts built using Tailor. If you need help converting a non-Tailored page, see our tutorial for converting content from the default editor to the block editor.
After we have installed the new theme update on your site, you will need to convert your existing pages, posts, People, Places and Items to the new page editor.
You can transition each page or post whenever you are ready. If you do not immediately convert pages, the front end appearance of your site will not change. However, you will not be able to edit Tailored pages until they have been converted to the new page editor — so we recommend converting these first!
Before you start
- If you’re new to the block editor, we recommend getting to know how to use blocks to build and edit pages. We also recommend you view the training video.
- Open a list of Tailored pages to convert: From your site’s dashboard, go to Settings > Tailor Pages to Convert.
- Open the “live” version of the page in a new tab. This will allow you to compare the post-conversion page to the original page.
Jump to a section below:
Conversion issues to watch for:
- Content elements
- Boxes and cards
- Accordions
- Lists
- Carousels and image slideshows
- Callout boxes
- Page converts to code
What to do if conversion fails
What to do if some or all of your content disappears
Starting the automated conversion
When you go to edit pages that have been Tailored, you’ll see a pop-up message directing you to convert the page to the new editor:
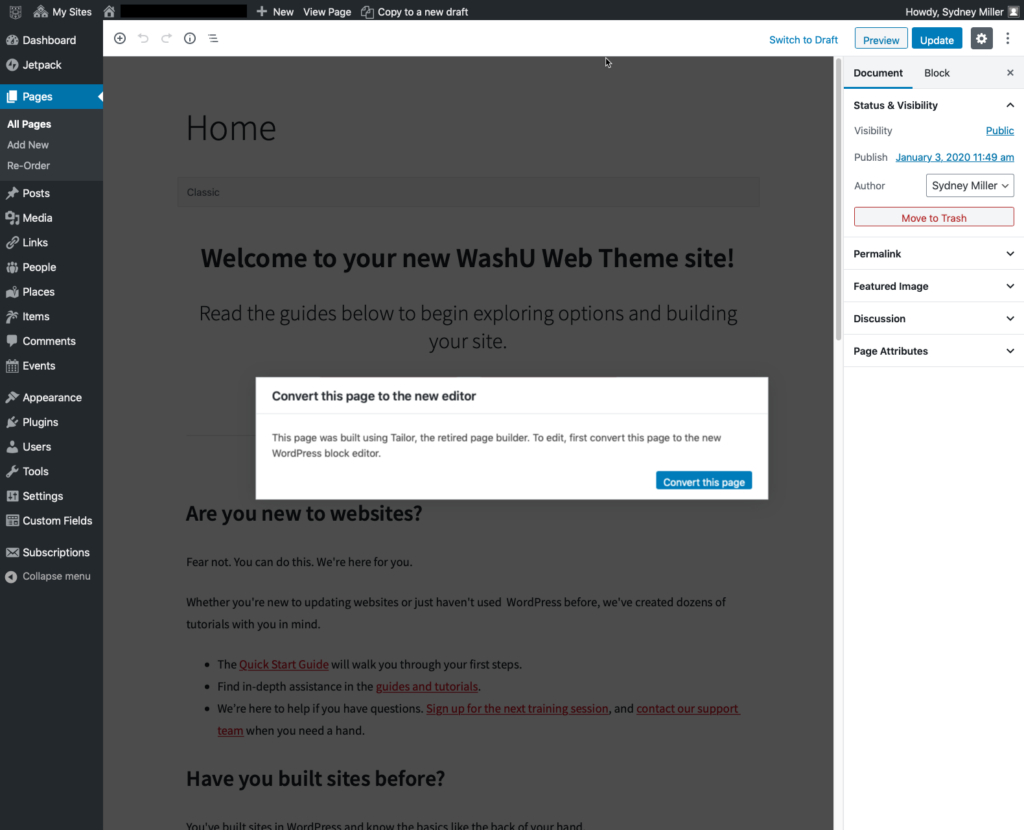
- Click Convert this page.
- Conversion is instantaneous. If your page was successfully converted, you’ll receive a confirmation pop-up message saying the page was converted.
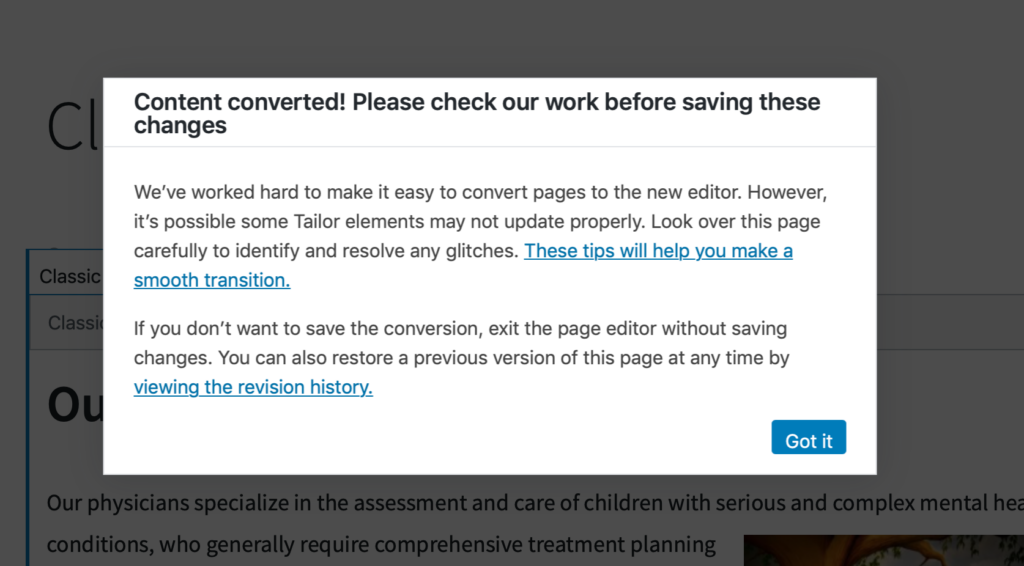
- See a different message? Jump to what to do when conversion fails.
Help! My page disappeared. Jump to what to do.
- Click Got it.
- You will see multiple classic blocks on your page. These contain your text, images, callout boxes and more, and require an additional step.
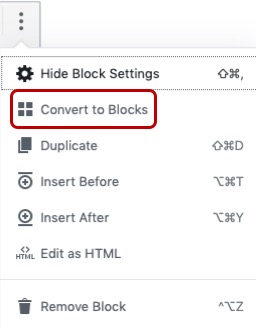
- For each block, click anywhere within the block to select it.
- Click the More Options kebab in the block’s top toolbar (it’s the second icon; it looks like three dots). From the dropdown that appears, select Convert to blocks.
- Now it’s time to carefully check your work! It can initially look like your page converted successfully, when some of your content is missing.
What to look for:- Change in layout or missing columns
- Change in colors, styles or images, particularly when converting Tailor Box and Tailor Card elements
- Missing text, headings, images or other basic content
- Elements that change to HTML
- Elements or parts of elements disappear (e.g., your page converts, but is missing text or shows an old version of the page)
- If sections of your content disappeared, you’ll need to rebuild part of your page. Jump to what to do.
Continue reading to learn about expected conversion issues — like those listed above — and how to handle them.
Conversion issues to look for
Most Tailor elements will convert without a problem. However, some elements may not have a one-to-one match in the new editor or may require an extra step.
Content elements convert to Classic Blocks
Anything inside a Tailor content element — including text, headings, images, buttons, callout boxes and more — will convert to a Classic Block.
When you convert a Tailored page, you’ll likely see several classic blocks; these blocks require one extra step to be fully migrated:
- Click anywhere within the block to select it.
- Click the More Options kebab in the block’s top toolbar (it’s the second icon; it looks like three dots). From the dropdown that appears, select Convert to Blocks.
Most classic blocks will convert correctly. However, a few blocks may convert to the wrong style or the wrong block type. Keep reading to learn about how to handle some of the most common migration issues.
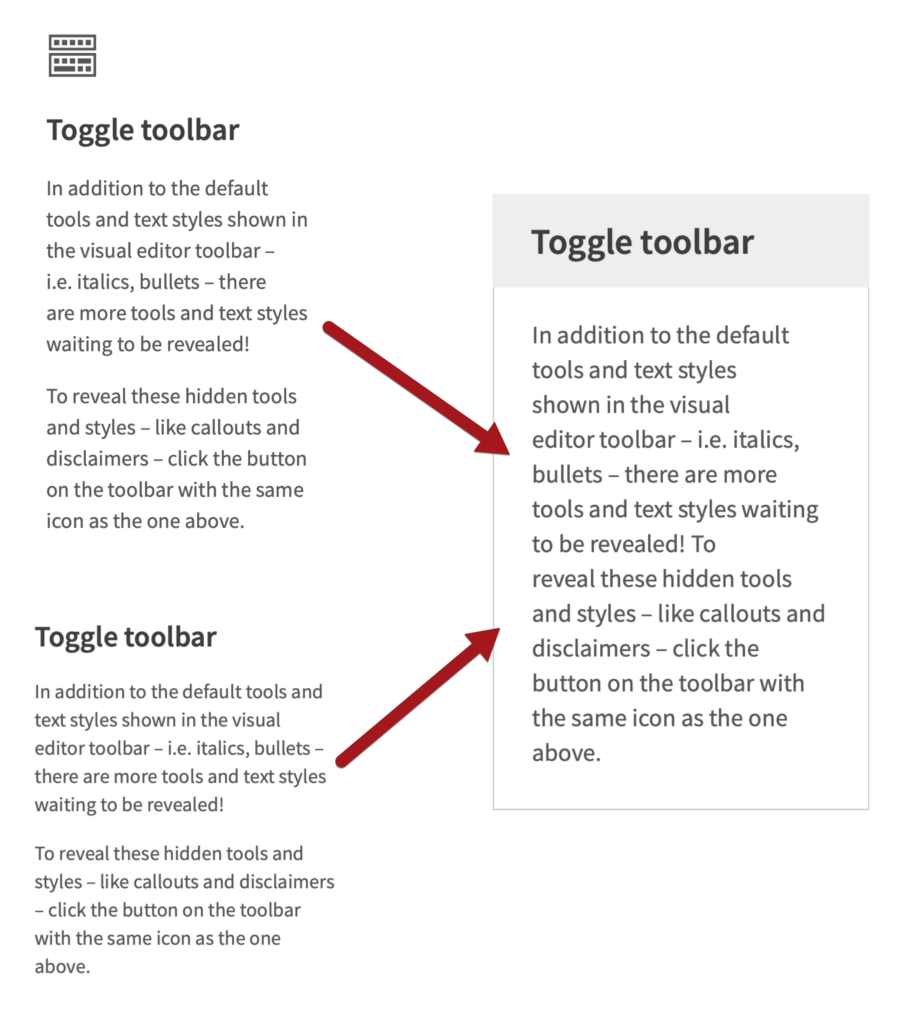
Other changes that might occur in the Tailor conversion include:
Right-aligned or centered text, headings, buttons and more, will convert to left-aligned elements. Easy fix!
- Click anywhere on the element to select the block.
- In the top toolbar, click either the text alignment or change alignment icon , and select the correct alignment.
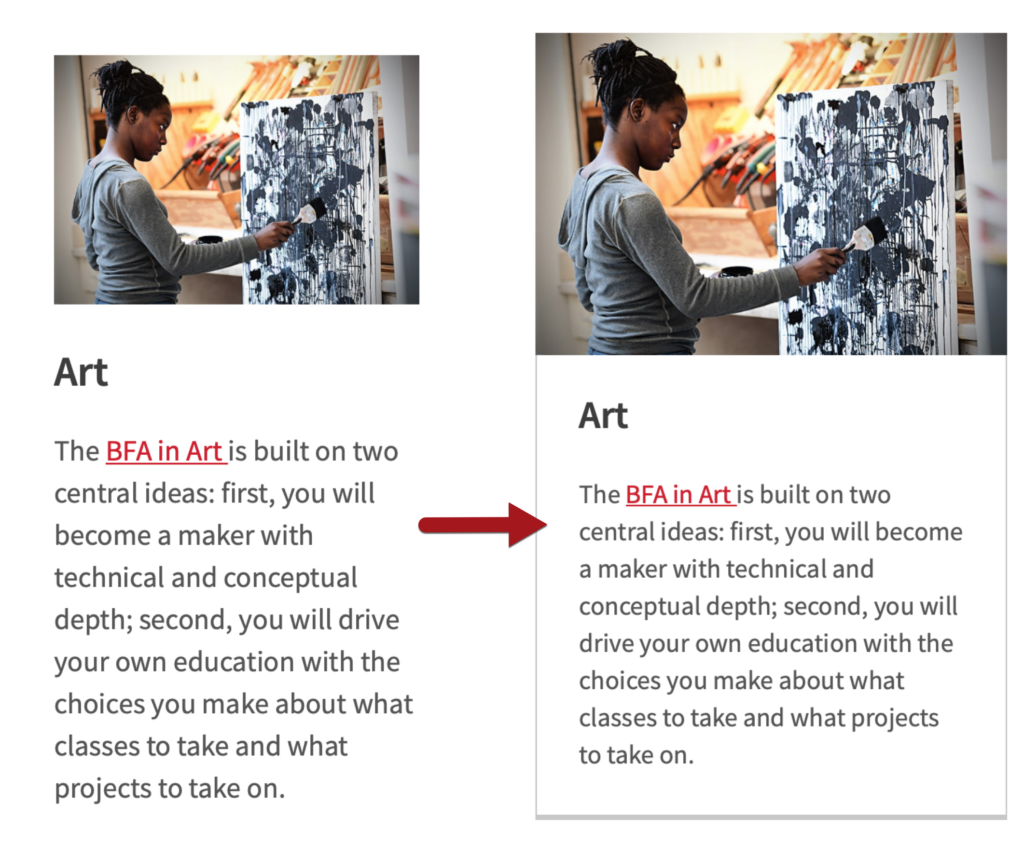
All Tailor Boxes will become Cards, which helps simplify page building — but it also means some of your styles may change.
Boxes turn into cards, icons disappear
Tailor Box elements with icons or with just a card title (no image) will convert to a card block with a text header:
Images cannot be placed inside cards
While you can still use an image as a card header, the new page builder does not allow images to be placed inside the content section of a card.
Tailor Cards with images in the body may be rebuilt as a card with an image header, or the image may be added to the page outside the card. You must delete the image inside the card to complete the conversion.
Tailor Boxes with images will convert to a card block with an image header:
Learn more about how to organize content using improved Cards »
In the Tailor version of your site, you may have nested other elements inside accordions. You can no longer nest elements like other accordions, cards, columns or separators (horizontal rules) inside an accordion.
Recommendation
If you convert an accordion that has one of these elements inside it, you will need to remove this content or rebuild it outside of the accordion.
The Tailor List element (shown below) is used to explain a process or make a high-level ordered list with sub-steps. It has more components than a simple bulleted or numbered list.
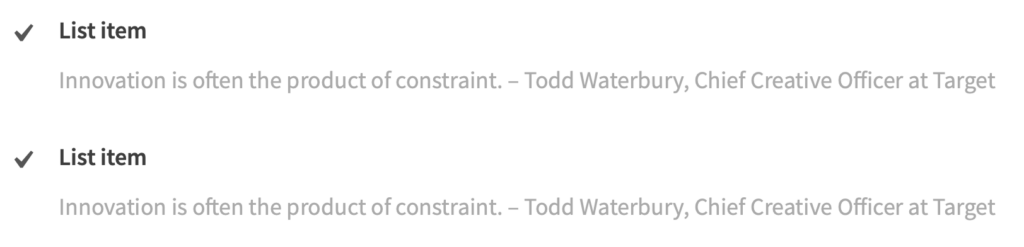
Tailor Lists do not have a one-to-one conversion match. This means Tailor List content will need to be rebuilt upon conversion:
- List item titles will convert to H3 headings.
- List item content will convert to a classic block.
- List item graphics and icons will disappear.
Recommendations:
- For simple lists, reformat the list using the list block, which is used to create bulleted and numbered lists.
- For high-level ordered lists with sub-steps, use the appropriate size heading or bolded paragraph text for the list item title and the list block for the sub-steps. See an example of this method on the Adding Images tutorial.
The Tailor Carousel element (shown below) creates a slider that contains images, text, or even latest posts. It is different from a slideshow in that it allows the site visitor to choose when to transition to the next slide.
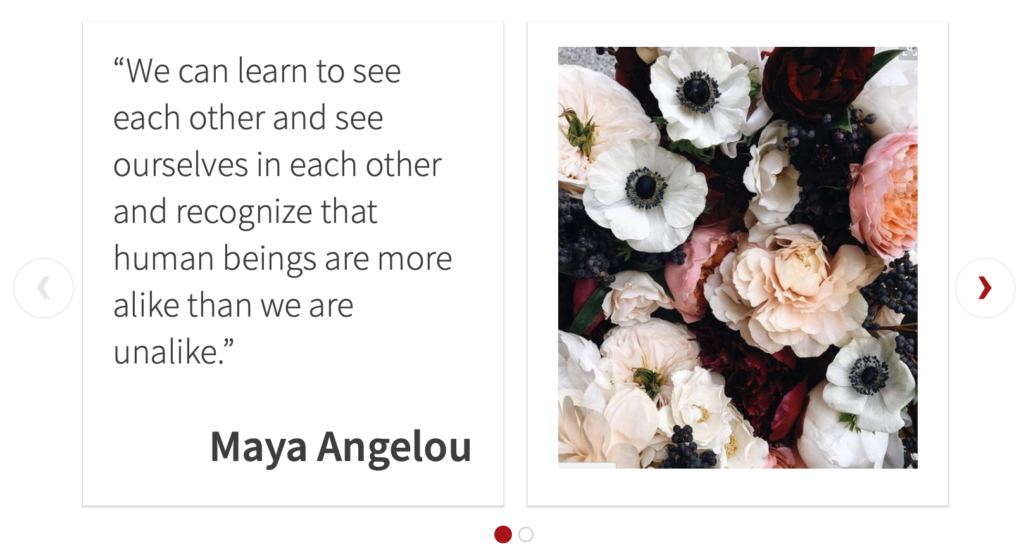
The Tailor Carousel element does not have a one-to-one conversion match. Instead, any content that was inside the carousel will convert to the relevant blocks. For example:
- Text, headings, and simple bulleted or numbered lists will convert to a classic block. Remember to convert these to blocks.
- Photos will convert to a classic block. Remember to convert these to blocks.
- Posts will convert to the latest posts block.
Recommendations
Rebuild the carousel using the content blocks that converted.
- To showcase images:
- Create a photo gallery.
- Use the slideshow block (requires Jetpack plugin).
- To highlight text, lists or quotations, consider using elements such as billboards, cards, quotes or pullquotes. You can mimic a carousel layout by placing this content in columns.
- To feature news posts in a slider, use the latest posts block and select the carousel layout.
Meet the Callout Box
These light green boxes help call out related or important content on your page.
Callout boxes convert to Custom HTML blocks (seen below).
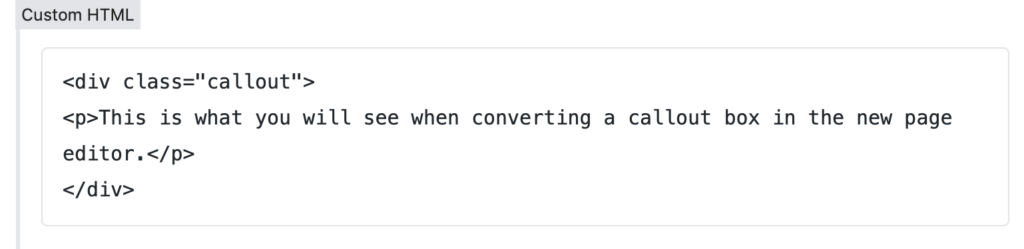
With the above code on your page, a site visitor will still see a callout box on your website. But unless you know HTML, it can be difficult to update the Custom HTML block if you’d like to change or add text.
For easier editing, we recommend adding new callout boxes:
- Add a new callout box block to the page. Learn more about adding blocks »
- Click the plus sign inside the block to add text, headings or other elements inside the callout block.
- Once you have finished rebuilding the block, delete the old block with the code.
- Click Preview, in the upper right corner of your screen, to check your work before updating.
- Contact sites@wustl.edu if you need help! Please include the page URL.
If you convert a Classic Block and see code — don’t panic!
This is likely caused by rogue HTML, which can happen when:
- You’ve copied and pasted text from another website or document
- Your site used to be in another theme, or you imported a website into the WashU Web Theme
Recommendation
- If sections of your page converted to code or you see other mistakes, exit the page without saving.
- Contact sites@wustl.edu for assistance. Please include the page URL.
How to revert to a previous version of a page
If you don’t want to save a conversion, exit the page editor without saving changes. Do not click the undo icon.
You can also restore a previous version of this page at any time by viewing the revision history.
If conversion fails
You’ll know if the automatic conversion has failed if you see a pop-up message that says, “Sorry, something went wrong.”
If this happens, contact the WashU Sites Support Team at sites@wustl.edu for assistance.

If content disappears
If some (or all) of your page disappears — don’t panic! This can happen when you build a page in Tailor, but then edit the page in the default editor.
- First, exit the page without saving. Do NOT click the undo button.
- Next, open the “live” version of the page in a new tab.
- Convert the page again, in a different tab, before moving to the next step.
Manually rebuild the page
You will need to manually rebuild part of or all of your page by copying and pasting content from the live version of your page onto the edit view.
If you need assistance with rebuilding a page or elements on a page, contact the Sites Support Team at sites@wustl.edu.
Converting Non-Tailored Pages to the New Editor
Convert pages, posts and PPI created with the default WordPress editor to the new block editor.
Converting Tailored Pages to the New Editor
Convert pages, posts and PPI built using Tailor to the new block editor.
Reverting to a previous version of a Page or Post
View the revision history and restore an earlier version of a page or post.