Editing Navigation Menus
Rearrange the order of pages in your site's menus.
WashU Web Theme sites have four types of navigation menus. Unless you’re using custom menus, menus are edited in one place, following the steps below.
- If you’re moving existing pages: Editing your site’s menus may change the URL / web address of affected pages, so take care to check for broken links after making any changes.
- If you’re adding a new page: First create and publish the page, then follow the instructions below to add it to a menu.
Key Terms
Main menu: Lists top-level pages (i.e. pages with no parent)
AKA: primary menu, primary navigation, horizontal navigation
Header menu: Collective term for main and dropdown menus; on a desktop computer, displays across the top of each page
Mobile menu: Condenses all menus under a menu icon when the site is viewed on smaller screens, such as mobile devices
AKA: mobile navigation, hamburger menu
Submenus: Lists child pages, or sub-pages, of a parent page
AKA: sub-navigation, secondary menu
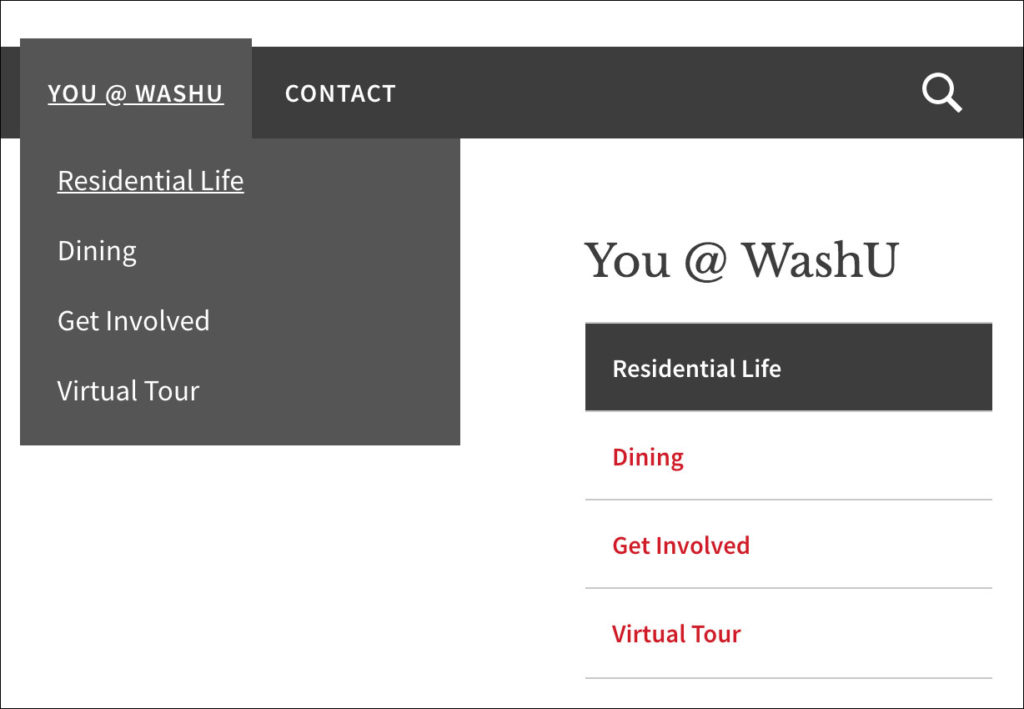
On a desktop computer, submenus display in two locations:
- Dropdown menu: Lists submenu when you hover over a parent page in main menu
- Sidebar menu: Lists submenu on the right side of a page that has or is a child
AKA: right sidebar menu, right navigation
How to order pages in your menu
New to building pages in blocks? Get to know the block editor »
1. Assign pages to their “parent”
To nest a sub-page under a main page in the site menus, you’ll assign the sub-page to a parent. A page must be published before it can be selected as a parent.
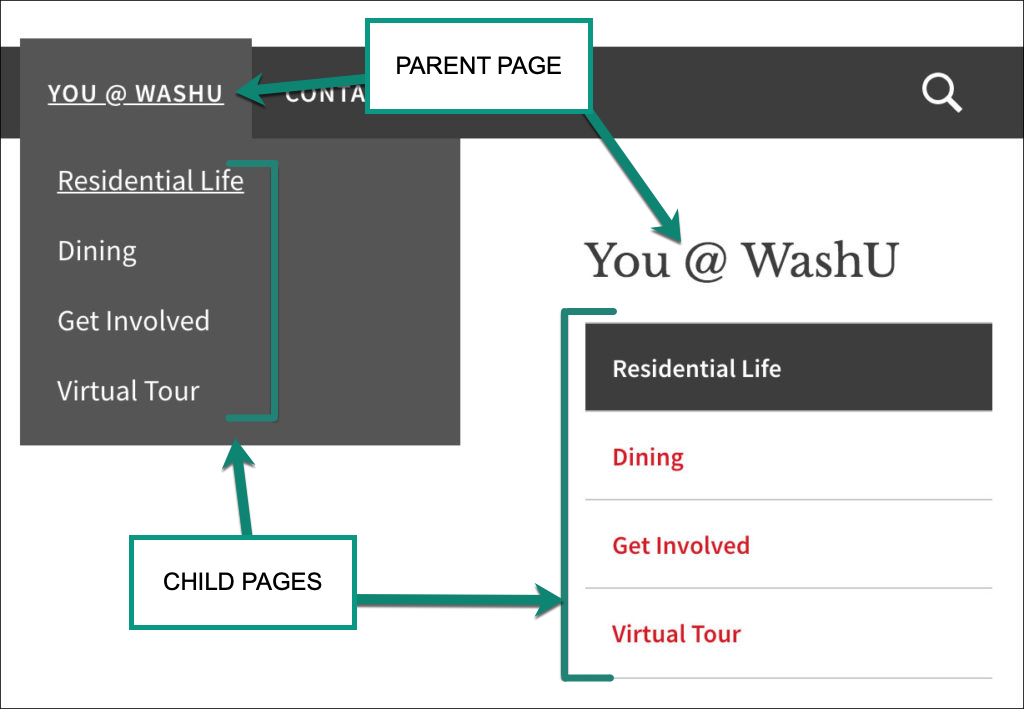
To set a parent, you’ll edit the sub-page — that is, edit the child page. In the right panel of the page editor, click the Page tab. Scroll to Page Attributes and select the parent page here. Learn more about page attributes »
Once you’ve assigned a page to a parent, you can set the order of pages following the steps below.
2. Order pages using drag and drop
From your site’s dashboard, go to Pages > All Pages. All drafted and published pages appear here, in the order they appear in the menu. Child pages, listed below their parents, are indicated with an em-dash (—).
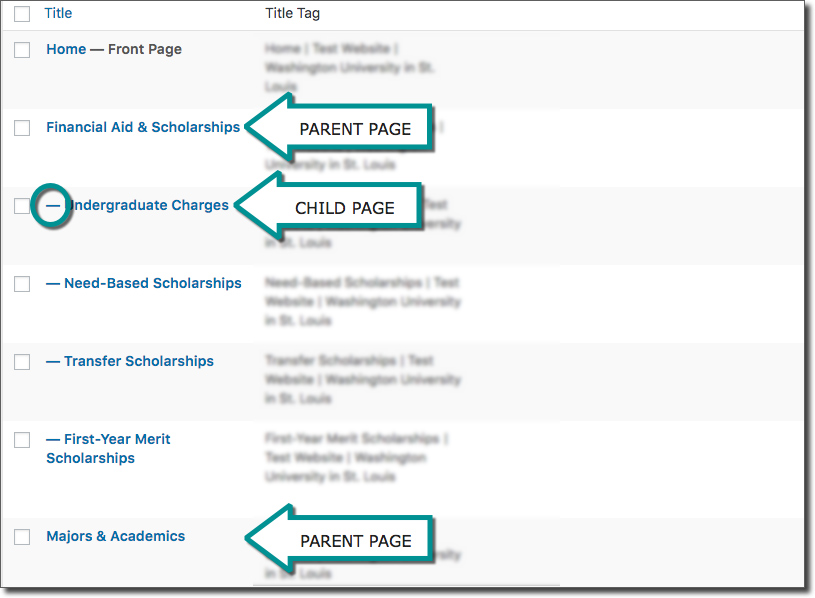

Displaying all pages on one screen
By default, the All Pages view displays 20 pages. If your site has more than that, you can change this default setting.
1. Click Screen Options in the top right corner.
2. Increase the number of items per page (up to 999).
3. Click Screen Options again to close it.
4. Now you can see all pages on a single screen to make reordering pages easier.
Order top-level pages to set the main menu
Drag and drop top-level or parent pages to the order in which they will should appear in the main menu. Child pages (indicated with the em dash —) will automatically stay with their parent.
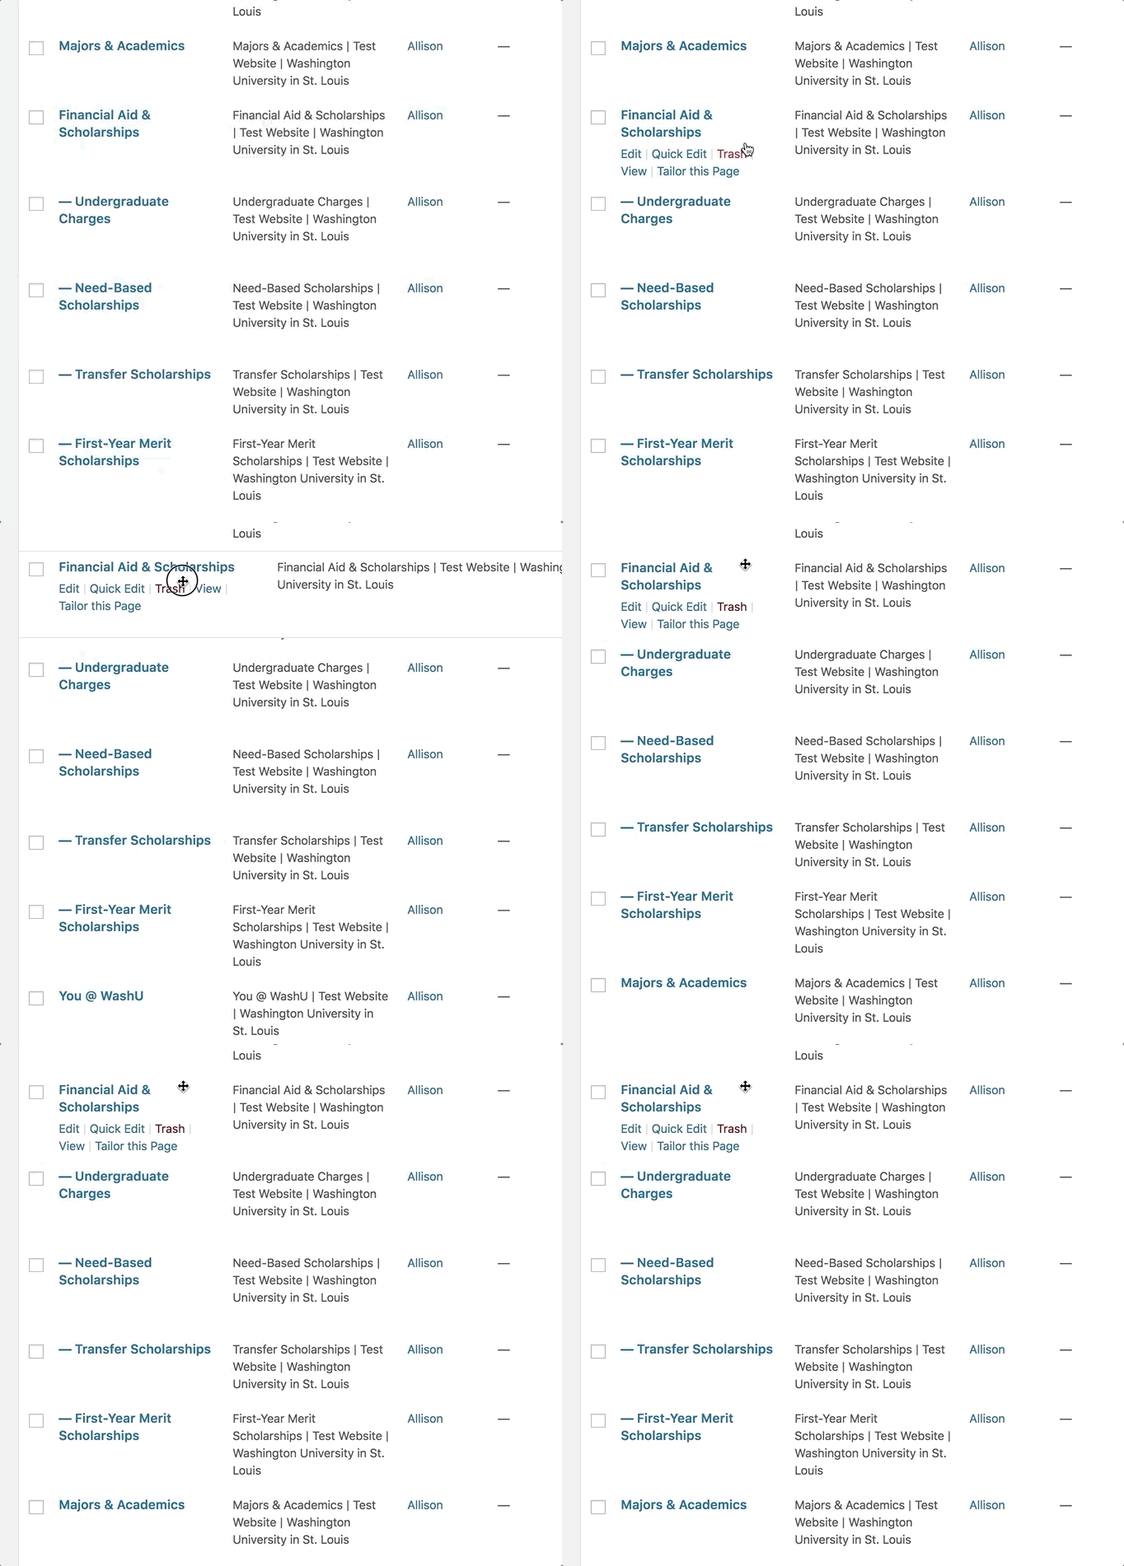
To drag-and-drop:
- Point your cursor next to the page title.
- When the crosshair cursor appears, click and hold to drag the page to a new position.
- Release your cursor to drop the page in its new location.
If you can’t drag-and-drop your pages, your site may be running the old menu builder. Follow the instructions below for “Switching from the old menu to drag-and-drop.”
You can also contact sites@wustl.edu for assistance.
Order child pages to set the submenus
Now drag and drop child pages to change the order in which they will appear in the dropdown and right sidebar menus.
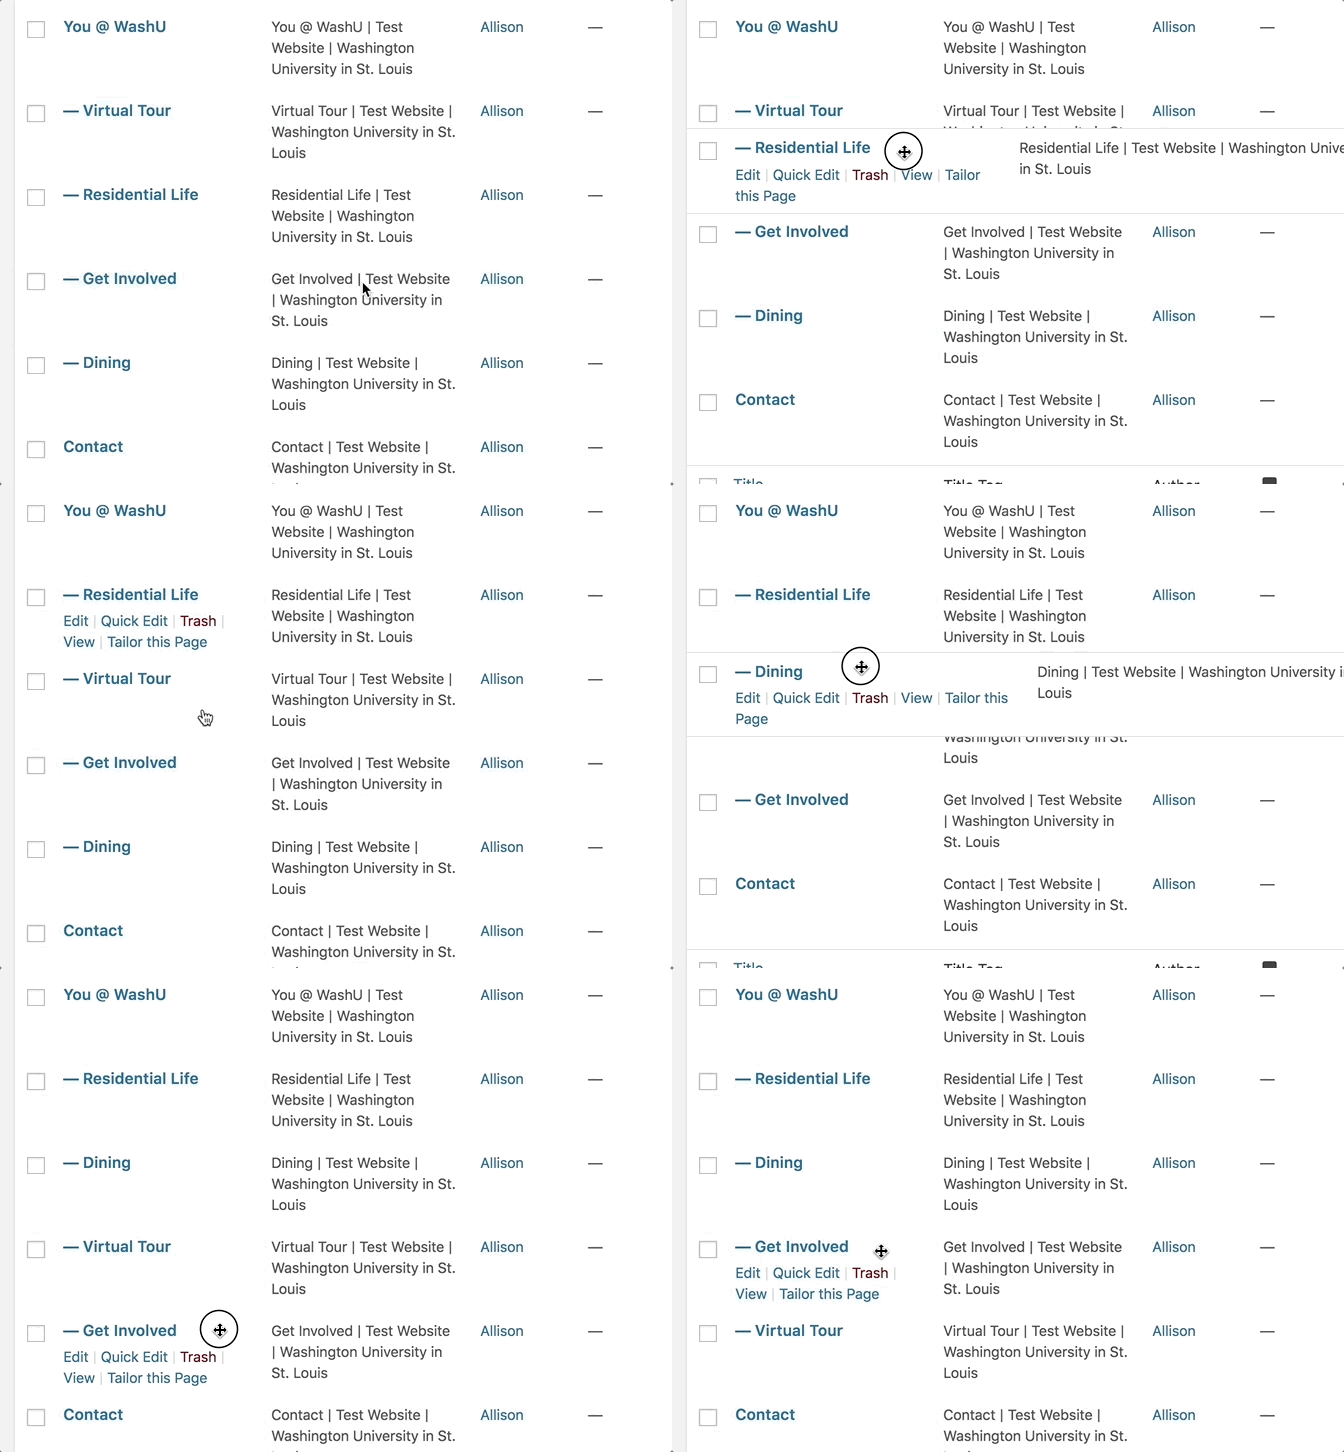
You cannot change a page’s parent via drag-and-drop. To assign a page to a new parent, edit the page attributes.
If you assign a page to a new parent, it’s URL will change, so links to that page will break. Remember to fix the broken links. If your site is live, you should also set a redirect.
Switching from the old menu to drag-and-drop
If your site was created before September 27, 2018, follow the steps below to switch to the new drag and drop menu builder. Then you can edit all site menus in one place, following the instructions above.
- From your site’s dashboard, go to Plugins and activate the Post Types Order plugin.
- Now from your site’s dashboard, go to Pages and reorder your pages – using the steps above – to match your existing menu structure, as seen in Appearance > Menus. It may be helpful to have your site open in two separate tabs as a point of reference.
- Once you’ve reordered your pages, go to Appearance > Menus.
- Under Menu Settings, uncheck both boxes (Automatically add new top-level pages to this menu and Main Menu).

- Click the Save Menu button (either one will do the job).
- View your website from the front end to check your menus. Are all pages where they should be? Go back to Pages if you need to reorder anything.
Adding a New Section with Multiple Pages
After you’ve launched your site, you may want to add a new top-level page with subpages, but this can be a little tricky with a live menu.
Creating Custom Menus
You can override your site’s automatically generated menus if customization is needed.
Site Header Styles
The site’s header displays on every page of your site, assuring visitors that they are in the right place.