Using Blocks: An Intro to the Page Editor
Laying out pages and editing content is a snap with your site's block editor.
In 2020, WashU Web Theme sites began transitioning to a new block-based page editor. The block editor replaced both the classic editor and Tailor page builder, which you may have used previously on WashU Web Theme or other WordPress sites.
To build pages, you enter each piece of content — including headings, paragraphs, billboards and images — as a separate, movable block. You have over 30 blocks to choose from so you can customize each page to meet your content goals.
Jump to a section:
- Adding more blocks
- Adjusting block settings
- Moving blocks
- Grouping blocks
- Deleting blocks
- Organizing blocks
Getting started
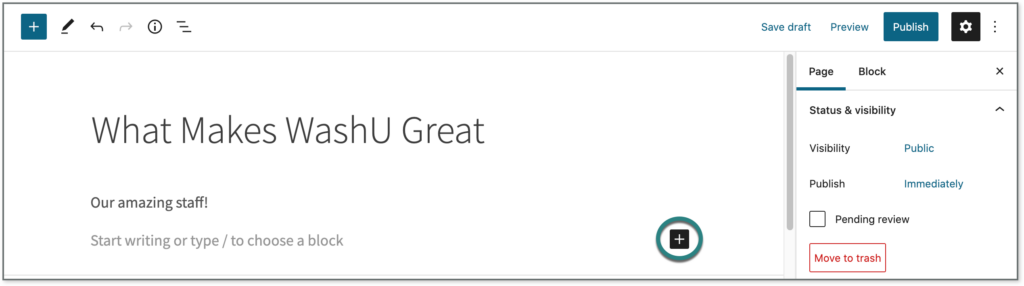
Every new page and post starts with a title and paragraph block.
- Enter the page or post title first. Check all of your other page settings as well.
- To add text, click into the paragraph block below the title and start typing or paste your content. Click enter/return to create and advance to a new block below.
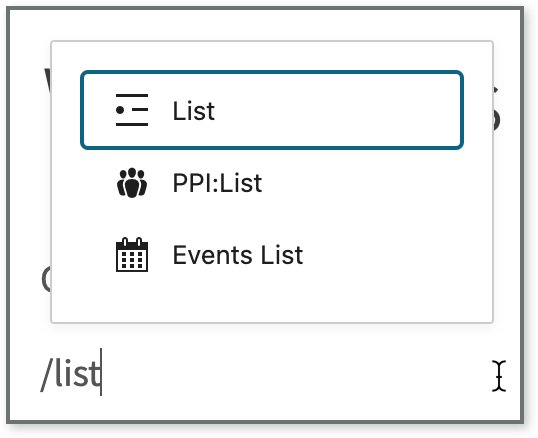
New blocks default to the paragraph block. To switch to a different block, you have a few options:
- Click into the paragraph block, then click the black plus icon that appears below. You’ll see a list of blocks that you can search or browse by category.
- Alternatively, click into the paragraph block and type a forward slash (/) followed by the name of the block you want to use.
Adding more blocks
You have several ways to add more blocks to a page:
- As mentioned above, click enter/return inside a block to advance to a newly created block below it. (This method does have exceptions. For example, in the list block — used to create bulleted or numbered lists — clicking enter will add a new bullet point or number in the same block. In this case, hit enter twice to create a new block.)
- Hover your mouse above or below an existing block, and click the black plus icon that appears.
- Click on a block, then click the three-dot icon (also called the kebab icon) on the right side of the block toolbar. Select Insert Before or Insert After to add a new block.
Avoid the Classic Block: If your site migrated into blocks from the older version of WordPress, you may be tempted to keep using the Classic Block, which resembles the former content editor. However, the Classic Block is not supported, and pages using it may eventually break.
Adjusting block settings
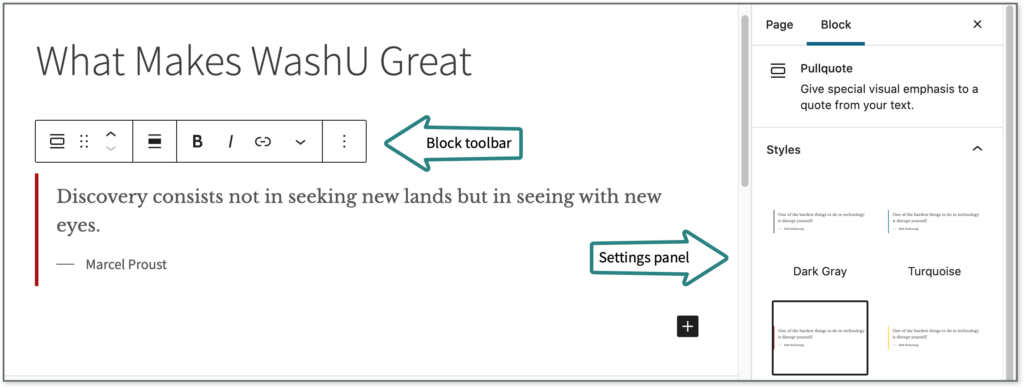
Each block has its own settings that, depending on the block, allow you to adjust formatting, styles, alignment, accent colors and more.
When you click on a block, look for settings in two places:
- The block toolbar appears immediately above the selected block, and generally shows basic formatting and alignment options
- The block settings panel is in the right sidebar, and generally contains more advanced settings and styles
Toolbar settings tend to be more text-based, and the right panel settings usually apply to the entire block; however, there’s no clear rule for which settings appear where. Remember to check them both, and you’ll have all your options covered.
Moving blocks
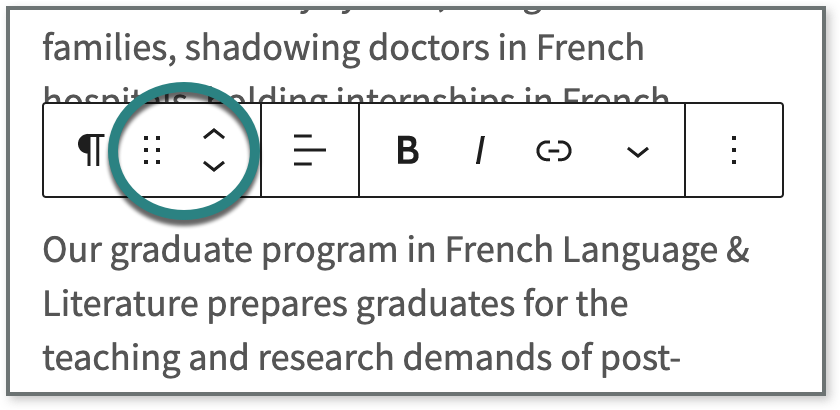
To move an existing block up or down the page, click on the block and find the arrows on the left side of the block. Click the up or down arrow to move the block one position at a time, or click and hold the grid of dots between the arrows to drag and drop the block to a new position.
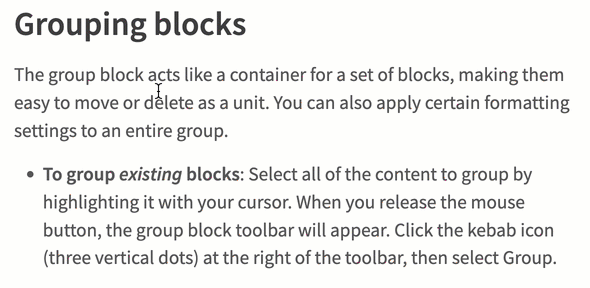
Grouping blocks
The group block acts like a container for a set of blocks, making them easy to move or delete as a unit. You can also apply certain formatting settings to an entire group.
- To group existing blocks: Select all of the content to group by highlighting it with your cursor. When you release the mouse button, the group block toolbar will appear. Click the kebab icon (three vertical dots) at the right of the toolbar, then select Group.
- To add new blocks as a group: Search for or select group block from the list of blocks. The group block will display with a block inserter inside it.
- To select a group block: The group block is a type of nested block, so it takes a few extra steps to select. Click on any block within the group, then click on the Select Group icon on the left of the block’s top toolbar. The animated screenshot below shows this in action.
Once blocks are grouped, you can rearrange or delete the whole group of blocks the same way you would a single block. Likewise, if you move an adjacent block, it will move past the whole group.
You also can create a reusable block from a group block, or apply settings to an entire group block. These settings allow you to add a consistent margin of space above and below a group block; simply select the group, and in the block settings panel on the right click the “Space Above/Below” button.
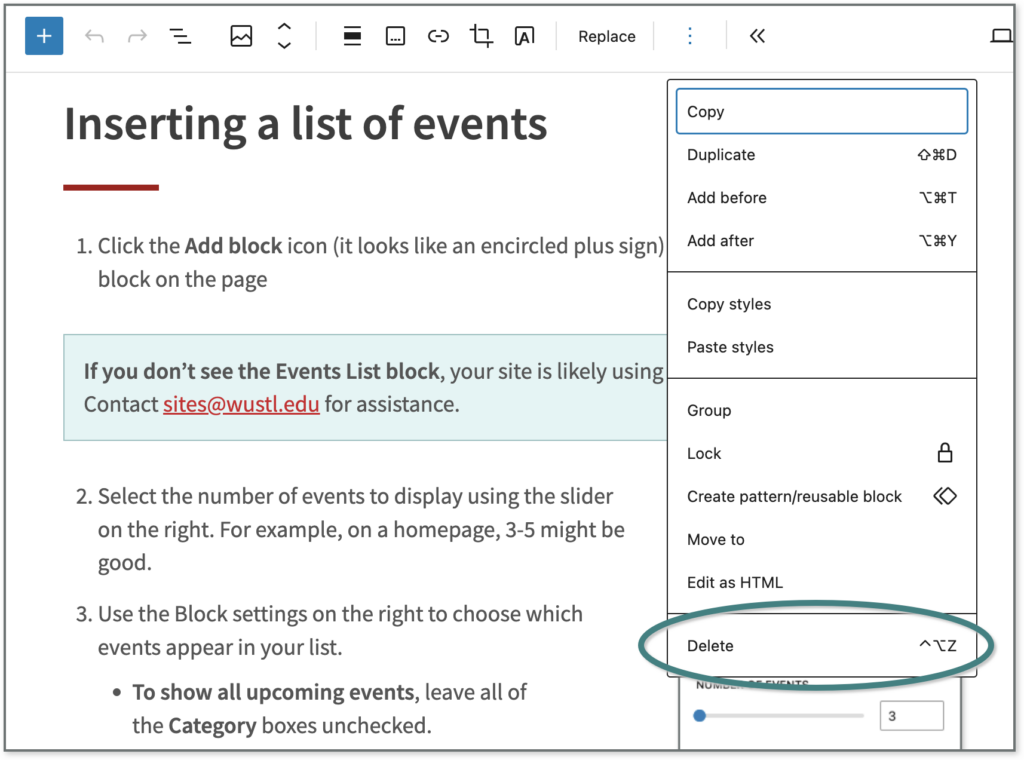
Deleting blocks
To delete a block, hover over the block and click the kebab icon (three vertical dots) on the right side of the toolbar. Select “Delete” at the bottom. (This previously said “Remove block.”)
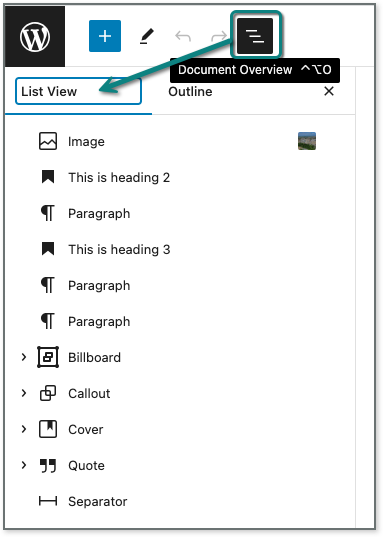
Organizing blocks with List View
List View is a helpful tool for navigating between layers of content and nested blocks.
The list view, which appears under Document Overview at the top of the page editor, shows you a hierarchical list of all the blocks on a page. From this list, you can select a block to work with, delete blocks, or move them around.
Working with Nested Blocks
When editing blocks that contain other blocks – like accordions, cards, columns and groups – it helps to have a few tricks up your sleeve.