Adding New Pages
Use pages for relatively static content that makes up the architecture of your site.
Pages are one of several content types available in the WashU Web Theme. Other content types — built with specific layouts and features — include posts, people, places, items and events. Explore content options »
Creating a new page
1. Add a new page
From the dashboard of your site, go to Pages > Add New. Or from the black admin bar at the top of any page, go to New > Page.
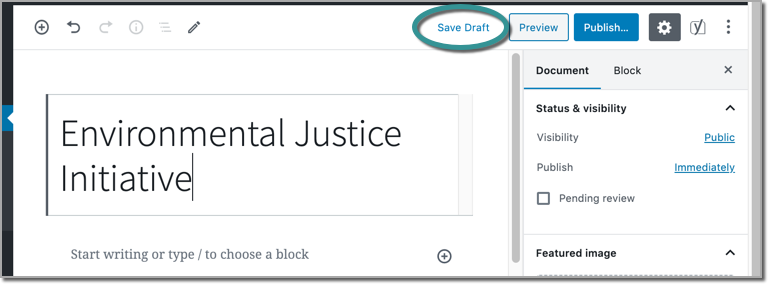
2. Enter a title
Name your page by adding a title at the top. The title you enter will also be the page’s label in the site menus.
3. Save the page as a draft
In the top right corner in the Publish section, click Save Draft.
Be sure to save frequently while you are building your page so that you don’t lose any of your hard work!
Preview the page at any time to see how the page looks to your site visitors.
4. Check the permalink/URL
The permalink is the page URL (eg. https://webtheme.wustl.edu/items/adding-pages/). The slug, which is the last part of the URL after the forward slash, is automatically generated based on the the page title. For example, the slug for this tutorial is adding-pages.
You can edit the URL slug in the right settings panel. However, once you publish a page, edit the slug only if necessary, since doing so will break links to the page.
5. Set a featured image (optional)
A featured image spans the page’s full width. The image appears above the page title and below the main menu.
Choose an image that is at least 1440 x 550 pixels, but ideally 2880 x 1100 pixels, for the best fit. Images that are smaller or larger may be stretched or compressed to fit the space, or they may not appear at all.
Learn more about choosing and setting a featured image »
To upload a featured image:
- In the top right panel, select Document to view page settings.
- Click Set featured image to choose an image from the media library or to upload a new one.

6. Change page width (optional)
The page width is determined by the page template. Select the template in the right panel under Summary.
Default Template:
Narrower content area optimized for readability. Sub-menu appears in right sidebar.
Full Width Page (best for homepages):
Content area spans entire page width. No sidebar menu. Longer line length is appropriate for short text only (headlines and brief descriptions).
7. Assign a parent page (recommended for most pages)
By default, new pages are added to your site’s main menu (unless you’re using a custom menu). However, the main menu has limited space and is meant only for top-level pages. Most pages on your site should be organized under a parent page. These child pages appear in the sub-menu under their parent page.
In the right panel, select the Page tab at the top and scroll down to Page Attributes > Parent Page. Select a parent page from the dropdown menu. After the new page is published, you can rearrange its order in the menus.
If the page should appear in the main menu:
Leave the parent blank. It will automatically be added to the main menu.
You have to publish a page before making it a parent. If your site is already live and you’re adding multiple pages at once, the logistics can get tricky. Learn more about adding a new section with multiple pages »
8. Add body content
Now that you’ve set your page features and attributes, you can get serious about adding content.
Page content is added using the block editor.
Learn about all the available blocks »
9. Save and publish
- Click Preview in the upper right to see how the page will look without saving the changes. The preview will open in a new window/tab.
- Go back to the editing window/tab and click Save Draft or Publish, depending on whether you’re ready for the page to be publicly viewable. If you’ve already saved a page as a draft or published it, the button will say Update.
- After changes are updated, click View Page/Post/etc. at the top to check your edits.
10. Edit the menu order
As described in Step 6 above, you’ve already set the page to be a sub-page or left it as a parent page. Now you can edit the order in which the page appears in the site menu.
Learn about editing navigation menus»
Adding a New Section with Multiple Pages
After you’ve launched your site, you may want to add a new top-level page with subpages, but this can be a little tricky with a live menu.
Adding New Pages
Use pages for relatively static content that makes up the architecture of your site.
Options for saving drafts, previewing and publishing content
Once a page is live, saved updates are publicly visible. Know your options for controlling the visibility of pages.
Reverting to a previous version of a Page or Post
View the revision history and restore an earlier version of a page or post.
Understanding & Editing Permalinks (URLs)
By default, a page’s URL matches its title. You can edit the URL by changing the slug.
Using Blocks: An Intro to the Page Editor
Laying out pages and editing content is a snap with your site’s block editor.