Selecting Featured Images for Pages
On pages, the featured image spans the full width of the page and requires special consideration.
On pages, the featured image sits just under the main navigation, spanning the full width of the page. It acts as a prominent banner that can make or break first impressions of your page. Its unusual aspect ratio and the WashU Web Theme’s responsive design can make selecting the right photo challenging. Read on to learn how to shoot, edit and select photos with the featured image space in mind.
Selecting a featured image
The featured image space on a page is similar to that of a billboard, about 2.5 times longer than wide. Its aspect ratio for pages is 28:11.
In contrast, professional photographers typically shoot at at 3:2 aspect ratio, and smartphones shoot at 4:3 or 16:9. Many photos shot at these aspect ratios can be difficult to crop in ways that look good in a page’s featured image space.
Ideally, if you are shooting new photography for your site, shoot photos with the intention of using them in the featured image space. That way, you and your photographer can shoot wide enough to accommodate the necessary cropping.
Select photos with a central focal point
If shooting new photography isn’t possible, follow one simple rule as you select photos for the featured image space: stay centered.
Good: The images below do not have any important visual information near the edges and would most likely look okay at most, if not all, standard screen sizes.


Debatable, testing needed: The images below have important visual information near the edges, such as people’s heads, or contextual elements that may be lost while trying to protect faces.


Sizing and optimizing featured images
Follow our tutorial Saving Images for Web for instructions on cropping and optimizing your images so they look great and load quickly. We’ve included instructions for using Photoshop as well as free web-based tools.
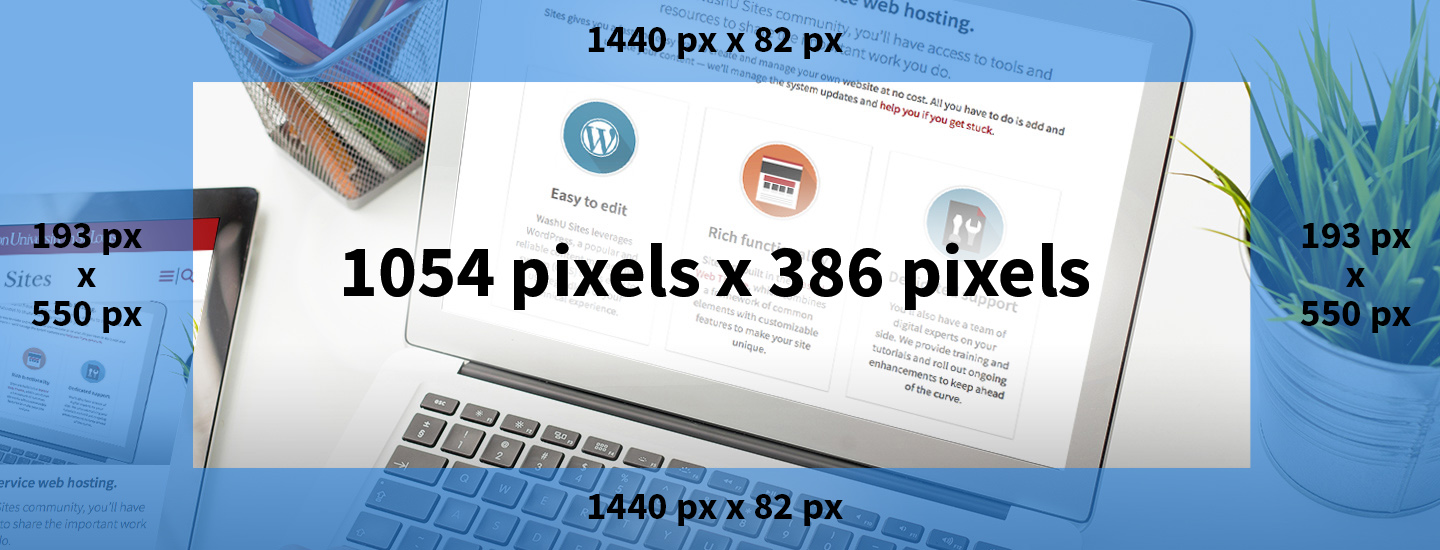
We recommend uploading an image that is 2880 x 1100 pixels, with a minimum upload size of 1440 x 550 pixels. However, at certain screen sizes, not all of those pixels will appear.
Because the WashU Web Theme is responsive, the amount of the image that shows will vary depending on a site visitor’s screen size, e.g. large desktop, small laptop, iPhone, Android phone, tablet, etc.
For this reason, as we discuss above, it’s best to pick images with a central focal point. That way your image will stay safe, with the most important part remaining visible.
Image size requirements
Images in the WashU Web Theme require specific dimensions to display properly. For a summary of image sizing requirements, see our cheat sheet.
Adding a featured image
Adding a featured image to your page is as easy as 1, 2, 3….
- From the page editor, go to the Document settings in the right panel.
- Click the Featured Image dropdown, and click Set Featured Image to upload an image or choose one from your Media Library.
- Be sure to add metadata!
Testing your featured image
After you add your image to the page, preview it on different screen sizes and devices. If the image does not appear at all, most likely it does not meet the minimum upload size listed above.