Basic HTML Code for WordPress
If something on a page doesn't appear quite right and you understand the basics of HTML, the easiest solution can be to look for rogue tags in the code.
Using WordPress does not require knowledge of HTML coding, but knowing the basics can help if something goes awry.
We recommend starting with blocks and using HTML only if needed to troubleshoot or add anchor links. WashU Web Theme usage guidelines disallow use of HTML to customize the theme. Furthermore, the WashU Sites Support Team is unable to assist with issues caused by the use of code beyond the basics described below.
Jump to a section below:
Intro to troubleshooting HTML in WordPress
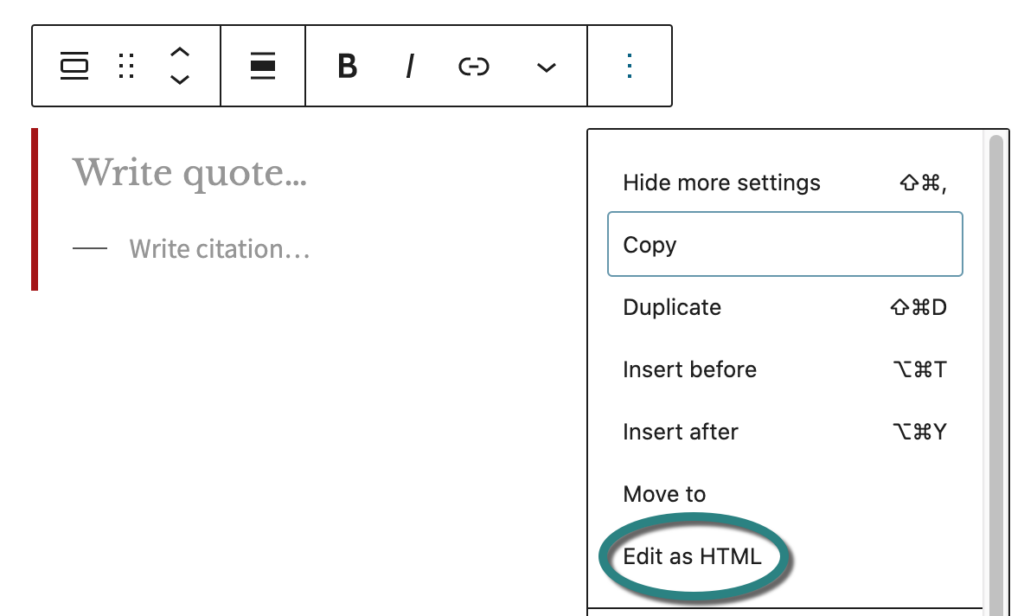
Edit a block’s code by selecting the More options kabob (it looks like three dots) from the top toolbar of the block. Click Edit as HTML.
You can also view and edit code for the entire page by toggling to the Code Editor in the top right corner of your screen (More tools & options kabob > Code Editor). In most cases, however, editing the HTML of only the block is easier and preferred.
Most HTML commands are placed in <angle brackets> and require two tags: The first turns a command on, and the second uses a forward slash to turn it off.
<strong>For example, “strong” tags are making this sentence bold.</strong>
The styles throughout your website are already set to ensure that all fonts, headings, links, bullet points and other features are consistent. Please use these predefined styles, rather than manually bolding, underlining, changing font colors and text sizes, etc.
Subheadings
- Heading 2: <h2>Level 2 Header</h2>
- Heading 3: <h3>Level 3 Header</h3>
Typeface
- Bold: <strong>bolded text</strong>
- Italics: <em>italicized text</em>
Extra paragraph spaces (non-breaking space)
Sometimes extra paragraph spaces inexplicably appear on a page, most often between body text and another element like an image, accordion, table or horizontal rule. These extra spaces are called non-breaking spaces, abbreviated in HTML. To get rid of them, simply switch to Edit as HTML, find the and delete it.
-
- No brackets or closing tag
Line breaks (soft return)
The easiest way to include a line break, also known as a soft return, is to hold shift + return, which can be done even when in Visual view. In HTML, a line break appears as:
- <br>
- No closing tag
Links
- <a href=”URL“>link text</a>
For example, this code:
A <a href="http://source.wustl.edu/story-title">recent study</a> reports that ...Displays as:
A recent study reports that …
Anchor links (links within a page)
An anchor link, also called a jump link or in-page link, takes users to a specific section of a page. For example, many pages on this site — including this page — have anchor links at the top so users can “jump” directly to a section.
Adding anchor links no longer requires HTML! Just follow these instructions »