Navigating WordPress as an Admin
Customize your settings for a better editing experience.
WordPress is a powerful tool, and navigating its many features and options can be overwhelming at first. These tips will help you make the most out of the WordPress dashboard and editor.
Jump to a section:
- Toggling between your live site and the page editor
- Seeing a list of all pages or posts
- Turning off the fullscreen editor or distraction-free mode
- Using the top toolbar in the block editor
- Showing or adding a featured image in the page editor
Many of these settings only need to be changed once and then will be saved as your default. Changing these settings affects only you; other editors of the site will set their own preferences.
Toggling between your live site and the page editor
If you’re logged into a site, a black utility bar appears at the top of the site. If you know you’re logged in and the toolbar isn’t appearing, refresh the page.
This admin bar is your toggle between the live site and the editor. If you’re viewing the live site and click on the site name in the toolbar, you’ll be taken to the dashboard. If you’re in the site editor and click the site name in the toolbar, you’ll go to the homepage.
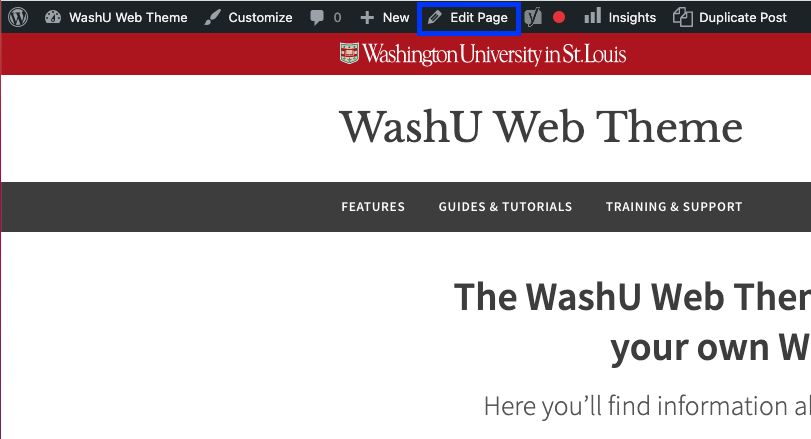
Similarly, the admin toolbar allows you to edit any page you’re viewing. On the live site, go to a page you want to edit, then click Edit Page (or Edit Post, Edit Person, etc.) in the toolbar. Voilà! Now you’re in edit mode.
Want to go back to the live page? Click View Page (or View Post, View Person, etc.), and there you are! Just make sure you’ve saved your changes first. Alternatively, you can preview changes without saving them.

Seeing a list of all pages or posts
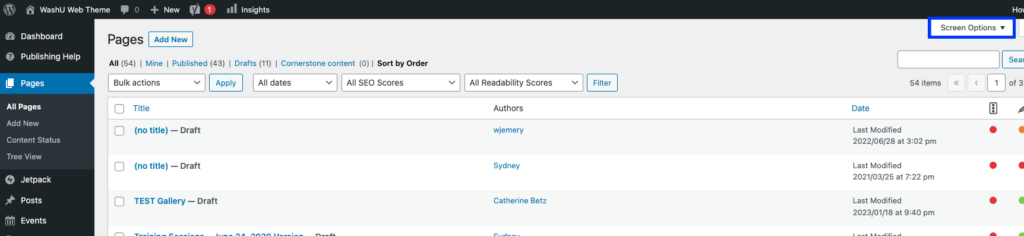
From your site’s dashboard, click on Pages (or Posts, People, Items, etc) in the left menu to see a list of all pages or posts — published, private and drafts.
By default, WordPress lists up to 20 pages per screen here. To increase this number, click Screen Options in the top right corner of your screen and change the number of items per page. We like to just add a 0 to the end of 20 and make it 200.
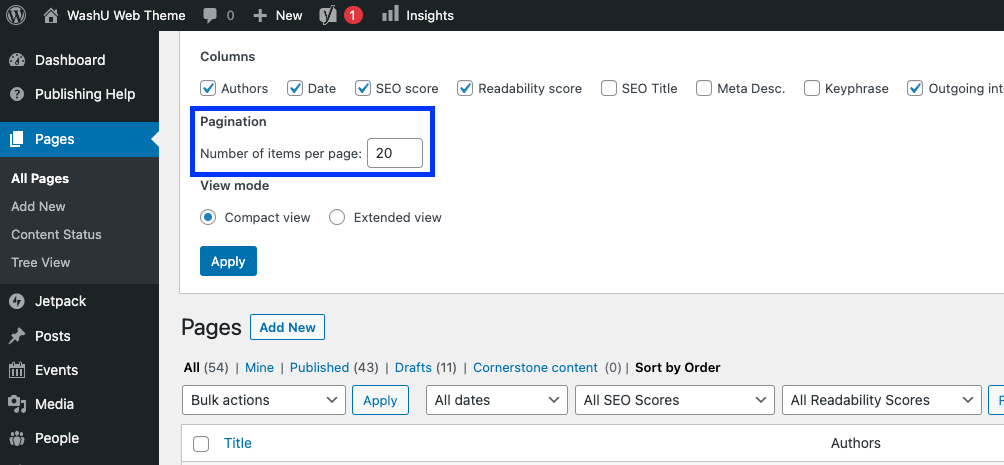
Then click Apply. Your new preference will be saved for future sessions as well.
Turning off the fullscreen editor or distraction-free mode
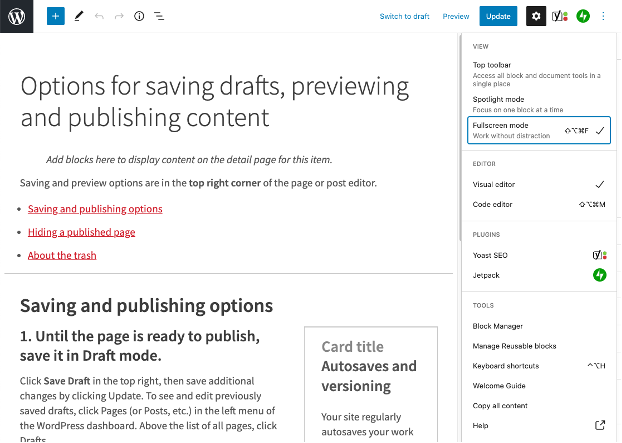
When you’re editing an individual page or post, the editor starts out by default in fullscreen mode, which hides the dashboard and admin toolbar. However, some users prefer to work with a slightly smaller editor, which allows you to also see the WordPress menu and admin toolbar.
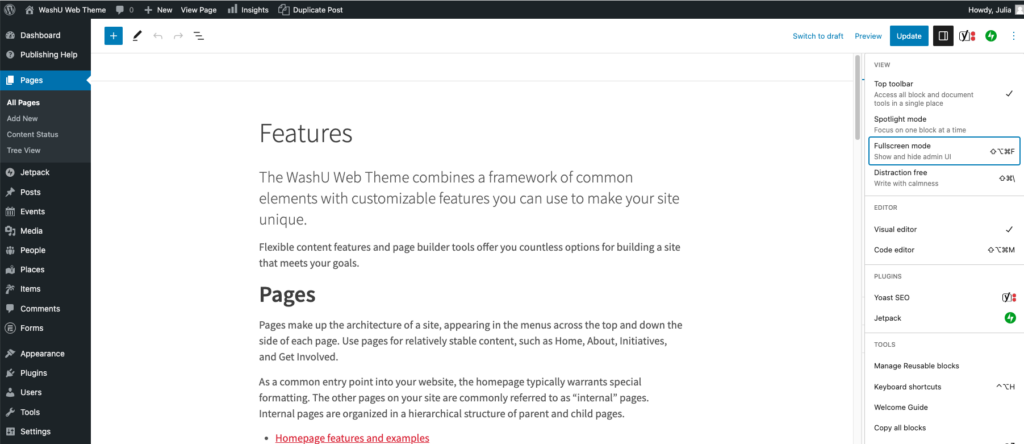
Similarly, the distraction free mode hides the settings at the top of the page editor but leaves the left menu in place.
To toggle these settings off or on: Click the kebab icon (three vertical dots) in the top right corner of your screen and click Fullscreen mode or Distraction free.
Using the top toolbar in the block editor
When you’re editing an individual block, some block settings — such as font and alignment options — appear in a toolbar that appears either directly above the block, or at the top of the page editor (top toolbar).
You can control where this toolbar appears by toggling the Top toolbar setting; click the kebab symbol in the top right corner of your window and click Top toolbar.
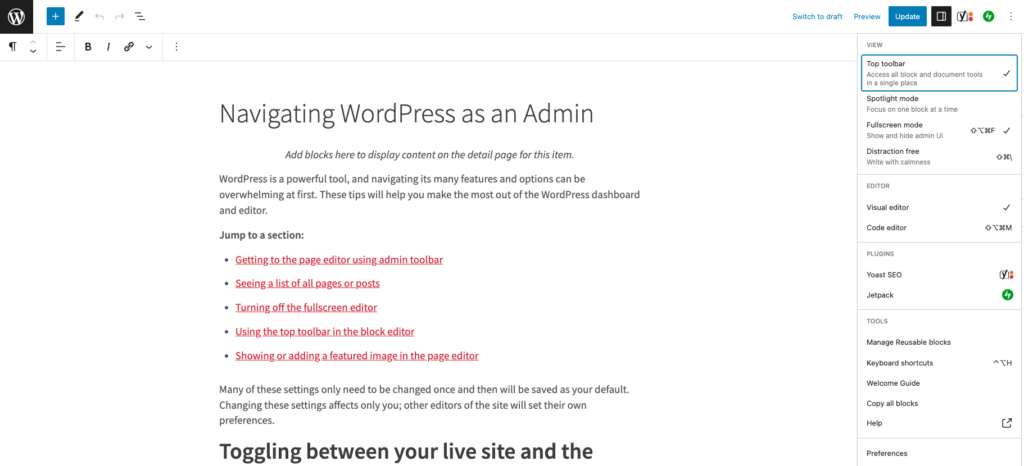
One thing to note: enabling the top toolbar removes your ability to rearrange blocks by dragging and dropping. You’ll need to use the up and down arrow options on the toolbar to move blocks around instead.
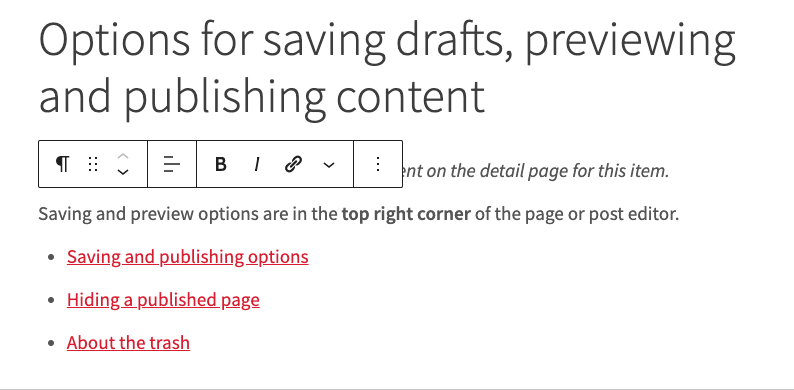
Showing or adding a featured image in the page editor
By default, a page or post’s featured image may be collapsed and difficult to find in the page editor. On the right side of the page editor, make sure Page is selected at the top of the settings panel. In the list of settings, find Featured Image; if it is collapsed, click it to expand.