Creating an Event Post
Add an event post that you can highlight by itself or as part of a calendar.
Anatomy of an event post: A short summary of your event will show up on the event snippet (preview). Visitors can click through to each event detail page for more information.
See events in action »
How to create an event post
1. Create a location
- Events have a pre-populated list of locations to select from. If you’re adding an event with a new location, create the location before you add the event. If you’re not sure if the location is new, skip to Step 2 so you can check the event editor page. The location dropdown is typically in the right panel at the bottom.
Tips for virtual events
Since the location field is useful for event previews and consistency, we recommend creating an event location (e.g., “Zoom”), even for virtual events. In the body of the event description (#3 below), provide instructions for attendees to join.
WashU IT recommends against listing Zoom links publicly, so you may wish to have attendees register; then you can email the link. Attendees can register by emailing you directly, or you can create a simple form.
See WashU IT’s best practices for Zoom meetings for more tips.
2. Create a new event
- From the left menu of your site’s dashboard, go to Events > Add New Event or, from the black admin bar at the top of any page, go to New > Event.
3. Add a title and description
- In the first block at the top of the page, Add title; this is the name of your event.
- Below the title, add a description of the event using blocks.
- We recommend that your description include an accessibility statement. (See sample accessibility statement from the WashU Medicine Office of Diversity, Equity and Inclusion.)

If you see a different editor than the one shown above, your site is likely using another Events tool. Contact sites@wustl.edu for assistance.
4. Add frequency, date and time
- In the Event Details section, select from the dropdown if your event is Regular (only happening once), Recurring or Multi-day.
- Check the box if this is an All day event.
- Set the date(s), time and recurrence, if applicable. You can also choose to Remove the date if you do not want it to appear on the event post.
5. Categorize the event
- In the right settings panel, select the Event tab at the top.
- Select Event Categories, if applicable. Use categories strategically and sparingly!
- You can also create and manage your event categories from the left menu of your site’s dashboard under Events > Event Categories.
Learn more about adding categories to posts »
6. Add a Featured Image
- In the right settings panel, select the Event tab at the top.
- Add a Featured Image (minimum 760 pixels wide, if desired. This will show up on the events detail page.
- We do not recommend adding a flyer as the featured image, though you may add a flyer to the body of the post if the flyer information is also provided in text form.
7. Add an excerpt
- In the right settings panel, select the Event tab at the top.
- Enter an Excerpt, a short summary of the event that acts as a teaser on the site calendar and event lists.
If you don’t enter an excerpt, the first 55 words of your event description will become the excerpt, which may or may not be the best summary of the event.
8. Select location
- In the right settings panel, select Event tab at the top.
- Find Event Location and use the dropdown menu to select a pre-populated location.

- If you haven’t created the location yet, save your event as a draft, go create an event location, then return to the finish creating the event post.
9. Save, preview, or publish
- At the top right, you may Save Draft, Publish it, or click the laptop icon to Preview it in a new tab. We always recommend previewing before publishing or updating a page.
Where do events appear?
When you create an event, it will appear automatically on any pages where you’ve inserted a calendar or category list that applies to that event.
For example, your site might have a calendar that lists events in all categories. It might also have a category-specific page, such as a page that only lists events categorized as “Seminars.”
Event post examples
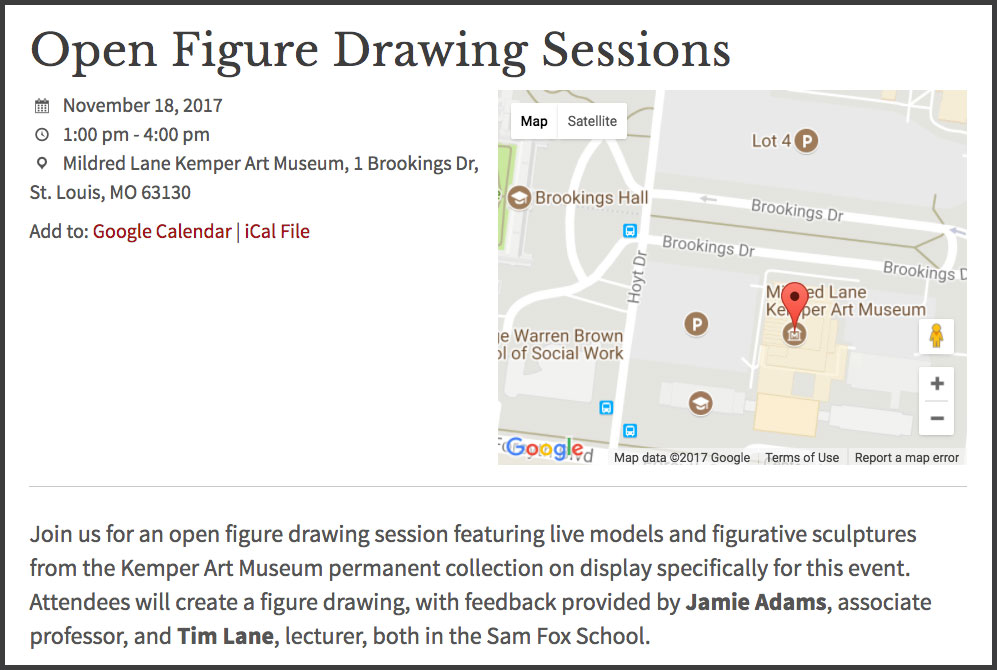
Post detail page
An event post detail page includes its title, date, time and full description, as well as an address and Google map (if added).
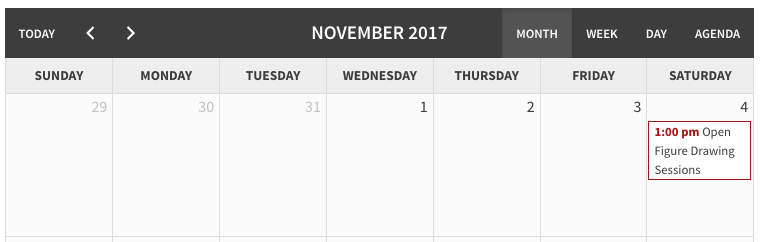
Event on a calendar
When the event displays on the calendar, it shows the title, date and time.
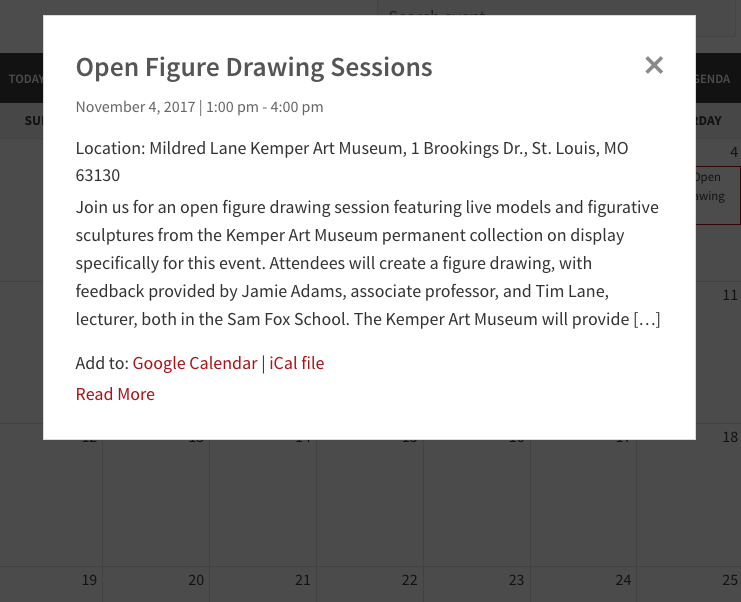
Popup window from calendar
When you click on an event in the calendar, a popup shows a summary of the event. This is the excerpt (if you entered one) or the first 55 words of the text entered in the event description.
Adding a List of Events to a Page
Add a list of all upcoming events, or events from one or more categories.
Adding Event Locations
Create event locations separately from the event itself — and before you create the event.