Creating a Person Post
Add people listings to your site by creating a separate post for each person.
People is a custom post type that allows you to create multiple entries that can be formatted, grouped and filtered similarly. It is part of People, Places and Items.
Parts of a Person post
Tile
A Person’s tile includes their photo, name, brief description (e.g., job title), contact information, social media links and summary.
It can link to a post detail page (see below), another website or nothing at all.
Where tiles appear
- On a page using the PPI: Individual block
- As part of a list of people (such as a directory) on a page using the PPI: List block
- At the top of the Person’s post detail page, minus the summary
Post detail page (optional)
The post detail page, should you create one, is the Person’s page on your site. It can be accessed through a Person’s tile or any other links pointing directly to it.
The tile appears at the top of the post detail page, followed by any text or images entered in the Person post.
How to create a Person post
From the left menu of your site’s dashboard, go to People > Add New, or, from the black admin bar at the top of any page, go to New > Person.
1. Add a title
- Type in a title; typically, this is the Person’s name. What you enter here will generate the slug for the post’s link — the part of the URL after the final slash.
As an example, you could shorten Chancellor Andrew Martin, PhD, to Chancellor Martin for the title field, which would produce a link ending of /chancellor-martin.
2. Add body text
- Skip this step if you included an external URL or plan to adjust your settings so that tiles don’t link to the post detail pages.
- Add and format the body content using the block editor below the post title. Content added here will appear in the post detail page.
3. Enter a name and contact information
- Under People Fields, enter the Person’s name, suffix, degree(s) and contact information (phone, fax and email).
![]() Formatting phone numbers
Formatting phone numbers
WashU style is XXX-XXX-XXXX. All dashes, no parentheses, no periods.
4. Add social media accounts
- Under Social Fields, enter the full URL link for any relevant social media accounts.
For example, the chancellor’s Twitter account would be https://twitter.com/washuchancellor, not @WashUChancellor.
![]() If social media icons aren’t showing
If social media icons aren’t showing
If the social media links you entered do not appear on the live site, you can toggle the settings to allow those fields to show.
Go to Dashboard > Settings > People, Places, Items > People and check the box to Include links to social media. On most sites, this setting is enabled by default.
5. Enter brief description text
- In the Additional Info section, you can add a brief description of your Person to display on their tile under their name.
- Use this space for a Person’s primary title as it relates to your group.
- Try to keep it short; if a Person has multiple titles, save those for the Summary field or body content of the post detail page.
6. Linking offsite (optional)
- By default, the name on the tile links to the Person’s post detail page.
If you would like that title to link to a different URL, like a profile on another website, enter that link in the External URL field.- We highly recommend using this option for people who already have profiles on other websites, e.g., Washington University Physicians, to avoid duplicate content and the need to maintain information in multiple places.
If you don’t want the tile to link to its post detail page or an external URL, consider adjusting your PPI settings.
7. Complete the summary field
- In the Additional Info section, there is a large text box labeled Card Summary.
The summary only appears on the tile, which appears when a place or a list of places is inserted on a page using the PPI: Individual or PPI: List blocks.
The summary does not appear on the post detail page. So, if you want the same information to show on the post detail page, too, you’ll need to copy and paste it into the body content section, just below the title.
8. Select categories
- If you plan to organize or filter People by type – such as role, department or graduating class year – create and assign categories under People Categories in the panel on the right side of the screen.
9. Include a Featured Image
- A featured image can be added in the Document settings in the right panel. Click Set featured image to choose an image from your media library or upload a new image.
- Upload or select an image from the Media Library that is at least 280 pixels wide by 386 pixels tall.
- If you upload an image that is larger than those dimensions, it will be cropped from the sides and bottom to fit the space. Too small and it won’t display.
![]() Headshots
Headshots
Crop all headshots at the same aspect ratio and scale, so the top and bottom of each face lines up and each person has the same amount of space around their head and shoulders. (See examples below.)
10. Save, preview, publish
- To save your work, click the Save Draft button in the top right corner.
- Click the Preview button to see what your Person’s post detail page will look like in a new tab/window; note that you will not see the summary since that content only appears on the tile.
- Exit out of the preview tab/window.
- If you’re ready for your Person post to be publicly viewable, click the Publish button; new changes can be published by clicking Update.
People Post examples
Samuel Achilefu, PhD
Includes: Name, brief description and summary
Links to: Post detail page
Note that the post title is different than the name that appears on the tile.
- If you click on Samuel Achilefu, PhD, then look in the website address bar, you’ll see that it says /samuel-achilefu at the end, rather than /samuel-achilefu-phd.
- That’s because Samuel Achilefu was entered in the Title field, instead of Samuel Achilefu, PhD.

Samuel Achilefu, PhD
Michel M. Ter-Pogossian Professor of Radiology
Achilefu’s research focuses on the design, development and biochemical evaluation of molecular imaging agents and drugs in cells and living organisms. He has earned national recognition for his work to use light to activate drugs and the immune system in the body.
Indira Mysorekar, PhD
Includes: Name, brief description, phone, email, summary
Links to: External URL
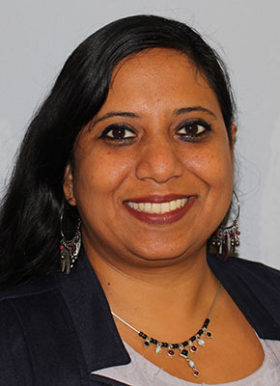
Indira Mysorekar, PhD
Associate Professor of Obstetrics & Gynecology
- Phone: 314-747-1329
- Email: imysorekar@nospam.wustl.edu
Mysorekar’s work encompasses studies of mechanisms underlying biology and pathophysiology of the urinary bladder to studies of novel infectious etiologies for premature birth.
Andrew D. Martin, PhD
Includes: Name, brief description, phone, email, social media links and summary
Links to: External URL
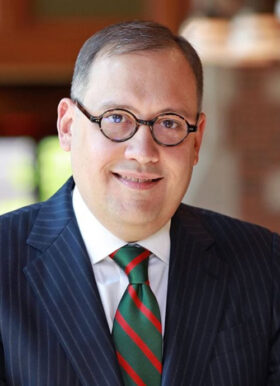
Andrew D. Martin, PhD
Chancellor of Washington University in St. Louis
- Phone: 314-935-5100
- Email: admartin@nospam.wustl.edu
An alum of Washington University’s Law School and faculty, Martin was appointed the university’s 15th chancellor in 2018.
![]() Cropping headshots
Cropping headshots
Be sure headshots are cropped consistently with each other so they provide visual consistency when displayed in a list or near each other.
A good rule of thumb: Make sure the person’s eyes align with the top third of the image.
Up next
Inserting an Individual Person, Place or Item (PPI)
Use the PPI Individual block to display a single faculty member, office location, research project or other post.
Inserting a List of People, Places or Items (PPI)
Use the PPI List block to create a dynamic list of staff, labs, publications and more.
Adjusting Settings for Places
Choose whether all of your place posts will display with an image or a map.
Creating a Person Post
Add people listings to your site by creating a separate post for each person.
Inserting a List of People, Places or Items (PPI)
Use the PPI List block to create a dynamic list of staff, labs, publications and more.
Inserting an Individual Person, Place or Item (PPI)
Use the PPI Individual block to display a single faculty member, office location, research project or other post.
Options for saving drafts, previewing and publishing content
Once a page is live, saved updates are publicly visible. Know your options for controlling the visibility of pages.
People, Places and Items
Use the tool for people, places or items to create directories, filterable lists and more.
Reverting to a previous version of a Page or Post
View the revision history and restore an earlier version of a page or post.
Turning Off Links for People, Places and Items
Block People, Places or Items tiles from linking to post detail pages.
Understanding & Editing Permalinks (URLs)
By default, a page’s URL matches its title. You can edit the URL by changing the slug.
Using Blocks: An Intro to the Page Editor
Laying out pages and editing content is a snap with your site’s block editor.