Creating Photo Galleries
Display multiple photos at once as a thumbnail grid.
The standard photo gallery displays multiple images in a cleanly spaced, responsive thumbnail grid.


How to use the gallery block
New to building pages in blocks? Get to know the block editor »
1. Activate carousel setting
The carousel setting produces a full-screen slideshow when users click on a photo thumbnail. This setting is part of the Jetpack plugin. Most sites have carousel view toggled off by default. You only need to activate this setting once.
From your site’s admin dashboard, check the left menu for Jetpack, listed directly below Dashboard.
- If Jetpack is not listed, follow these instructions to enable Jetpack and activate carousel view.
- If Jetpack is listed, follow these instructions for activating the carousel (this skips the step for enabling Jetpack).
This website has carousel view activated, so the gallery examples on this page demonstrate how it works.
2. Add the gallery block to the page or post
3. Add images to your gallery
Images can be uploaded directly into the gallery block or selected from your Media Library.
If uploading from the Media Library, select multiple images at once. Once you have selected your images, click “Create new gallery.” On the next screen, drag and drop to reorder images, and add and edit captions. Unless you reorder your gallery, the images will appear in the same order in which you selected them.
Click the Insert gallery button in the lower right corner of the window.
![]() Edit image titles in the Media Library
Edit image titles in the Media Library
When a user clicks on a thumbnail in your gallery, the image title will be visible. For example, the first image in the gallery below has the title “medical-school-02.”
By default the image title is derived from the file name, but you can edit it from the Media Library. Use image titles that are descriptive and meaningful.


4. Edit the gallery
Add more images
Click anywhere on the gallery block, and a section will appear below it with the option to add more images via Upload or Media Library. You can also drag and drop new files on top of the gallery block.
Edit captions
Within the gallery block, click the image you wish to edit. You can edit the caption or add a new one by clicking Write caption… at the bottom of the image. You can also add a caption to the entire gallery at the very bottom of the gallery block.
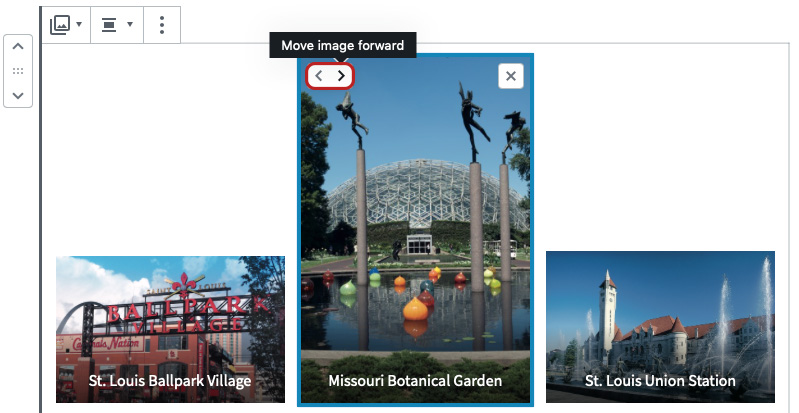
Re-order images
Select an image in the gallery block and use the arrows in the top left corner to change the image’s ordering.
5. Adjust the gallery settings
Adjust columns
From the block settings in the right panel, adjust the number of columns in which images will display (up to eight columns).
![]() Use the column setting to highlight important images
Use the column setting to highlight important images
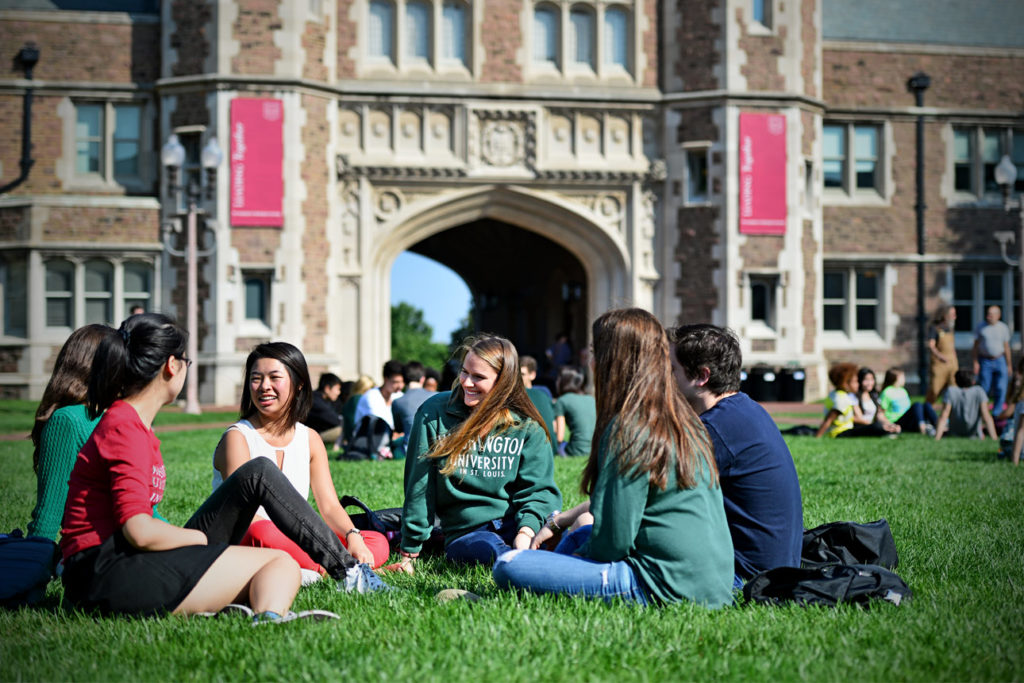
If you have one or two images you want to feature prominently, you may wish to set the number of columns to be one or two fewer than the total number of images. This results in a row of smaller photos across the top and larger image(s) beneath, as shown in the example at the top of the page.
Crop images
Under block settings in the right panel, choose whether or not to force crop your images in the gallery thumbnail preview. There is a trade-off to consider: If the images in the gallery are of different sizes and aspect ratios, misalignment can occur. However, not all images are meant to be the same aspect ratio; force-sizing the thumbnail preview can result in unfortunate cropping.
Experiment with the Crop images setting and with reordering, and consider editing images before uploading to optimize your gallery.
Link to options
These options determine what happens when a users clicks an image thumbnail.
The carousel setting overrides all three of these options. If carousel view is enabled, clicking a thumbnail displays the image in a full-screen carousel. Learn how to activate carousel view.
If carousel view is not enabled:
- None (default): Thumbnails are not clickable.
- Attachment Page: Clicking a thumbnail displays the image on its own, separate page of your site. The image title is used as the page title. Users are not able to scroll to the next image.
- Media File: Clicking a thumbnail displays the image full-size. Users are not able to scroll to the next image.
Image Size Cheat Sheet
Images in the WashU Web Theme require specific dimensions to display properly.
Overlaying Text on an Image with the Cover Block
Use the cover block to add readable text over an image or mimic a parallax effect.
Saving Images for the Web
Crop and optimize your photos before uploading to your site for crisper, faster-loading images.
Selecting Featured Images for Pages
On pages, the featured image spans the full width of the page and requires special consideration.
Troubleshooting
Something off? Check these tips when saved changes don’t show, images aren’t quite right, or extra spacing appears.
Types of Images
Insert a featured image to highlight the main theme of a page or post. Include additional images in the page or post body.