Adding Images
Insert photos or graphics into the body of a page or post.
![]() Before uploading an image
Before uploading an image
Crop it to the right size, touch it up or color correct, optimize it for web and save it with a short and descriptive file name.
Adding images to a page or post
New to building pages in blocks? Get to know the block editor »
1. Add an image block
Click the Add block icon (it looks like an encircled plus sign) to insert the Image block on the page. You’ll be given the option to:
- Upload a new file
- Click Upload or drag and drop files from your computer into the image block.
- Select an existing file from the Media Library
- Click Select Image > Media Library.
- Select the image you wish to insert. (A checkmark in the top right corner of the image indicates that it is selected.)
- Click the Select button in the bottom right corner to add the image to the page or post.
- Insert from URL
- Click Insert from URL when you’d like to embed an image from another website.
- Paste the image url into the field and hit enter.
Learn more about embedding content from third-party websites »
Looking for photos you can use for your site?
The Danforth Campus Photo Library and the School of Medicine Photo Library offer a selection of pre-sized photos and information on requesting photography.
2. Add metadata
Once you’ve inserted an image, add metadata to help visitors and search engines understand its context.
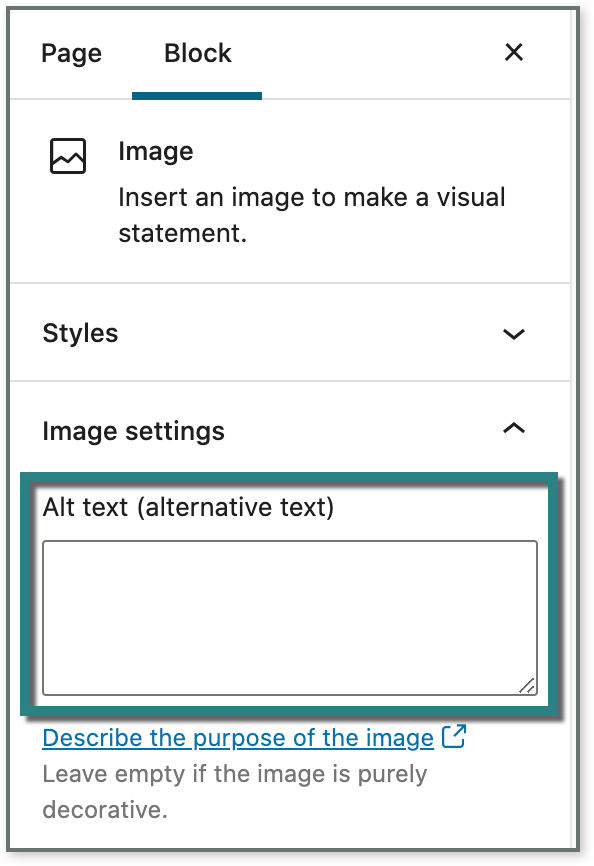
- Alt Text
Find the alt text field under block settings. Alt text is critical for accessibility and also helpful for search engine optimization. Make your alt text succinct and descriptive. It is read in place of an image for site visitors using screenreaders, and it appears in place of an image if the image doesn’t load. For visitors using screenreaders, the alt text may be redundant if the caption or other page content provides a description. Alt text also is not recommended when an image is purely decorative. Leave the alt text blank if details would annoy rather than assist users. The theme will insert an empty or null alt attribute if left blank, in accordance with accessibility standards. Visit WebAIM to learn more about optimizing the alt attribute for accessibility. - Caption
The add caption button is in the top toolbar of the image block. In addition to describing who or what the image shows, the caption can be used to credit the photographer or illustrator (e.g. Photo: Annie Leibovitz).
Learn how to add and edit captions »
If you’d like, you can also add additional metadata to images in your Media Library.
- Title
The image title displays when you mouse over an image in some browsers, including Firefox and Opera. WordPress uses the file name as the default title; editing it is optional. Avoid personal identifiers that violate HIPAA or FERPA. - Description
The description is visible and searchable within your Media Library, but it is not publicly visible on your website.
![]() Editing photo captions
Editing photo captions
We’ve just described how to edit your metadata in the media library. Editing a file in the media library changes the file across your entire site. If you use the same image on multiple pages, consider how your edits will impact other pages.
However, you can also edit the image caption on the page. When you insert an image block, add or edit the caption below the image. Doing so only changes the caption on that page, and won’t change the file information anywhere else on your site.
3. Adjust the size of the image
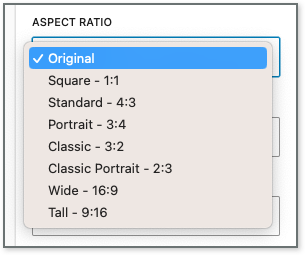
Aspect ratio
The theme has several aspect ratios that you can choose from in the right panel of the block settings to adjust the shape of your image.
This feature can be helpful when you’re looking to maintain consistency across multiple images, or when you’re replacing one image with another.
Resolution
The theme has several pre-set display sizes, which you can adjust in the block settings in the right panel:
- Full Size: Inserts the image using its original dimensions or spans the full width of its container.
- Large: Spanning the full width of a container, whether it is a column or the body content of a page, large size is ideal for horizontal images.
- Medium: Sizing to about half-width of a container, medium sizing is deal for vertical images.
- Thumbnail: 150 x 150 px, thumbnails should be used for headshots.
Does your image look blurry? Try optimizing it for web»
4. Set alignment
Alignment can be set in the top toolbar of the block. Observe the following alignment recommendations (see step 6 below for sizing options):
- Smaller images (thumbnail or medium):
Align left or right so text wraps cleanly around them. - Larger images (large or full size):
Select no alignment if you’d like the image to span the entire width of the content area (if it’s large enough). Images with no alignment sit left, but text does not wrap.
5. Add a link
In general, we do not recommend applying links to images.
However, if the image has a certain level of detail, it may be useful to link to the image file itself — e.g., click to enlarge. To choose this setting, select the image block, click the link icon in the top toolbar, then select Enlarge on click. A lightbox effect will be used to open the image file at full size.
Image Size Cheat Sheet
Images in the WashU Web Theme require specific dimensions to display properly.
Overlaying Text on an Image with the Cover Block
Use the cover block to add readable text over an image or mimic a parallax effect.
Saving Images for the Web
Crop and optimize your photos before uploading to your site for crisper, faster-loading images.
Selecting Featured Images for Pages
On pages, the featured image spans the full width of the page and requires special consideration.
Troubleshooting
Something off? Check these tips when saved changes don’t show, images aren’t quite right, or extra spacing appears.
Types of Images
Insert a featured image to highlight the main theme of a page or post. Include additional images in the page or post body.